You can move an existing instance to new Public Cloud by exporting its disk, importing it as a custom image in new platform, and launching a new instance from that image.
Before you begin
- The instance must be stopped to export its disk, so plan for downtime.
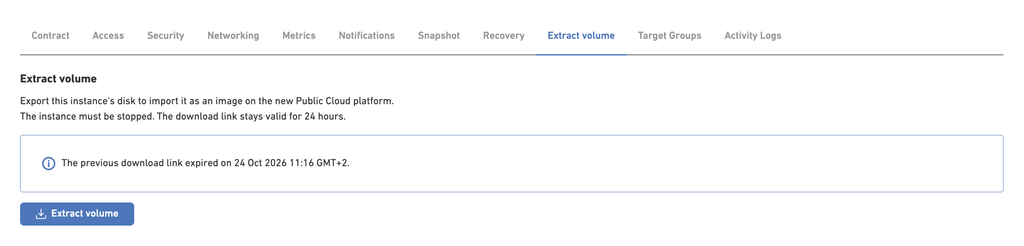
- The download link for the exported disk is valid for 24 hours. If it expires, export the disk again.
- Instances on Public Cloud [New] don’t get a public IP address automatically. You’ll need to assign a new public IP. Then update DNS records, firewall rules and any configuration that uses the old instance.
- Choose a new instance type with a disk at least as large as the exported disk.
Step 1: Export the disk from Public Cloud [Old]
- Log in to the Customer Portal and go to your Public Cloud instances
- Open the instance you want to migrate.
- Under Quick Actions, click Stop and wait until the state shows STOPPED.
- Open the Extract volume tab and click Extract volume.
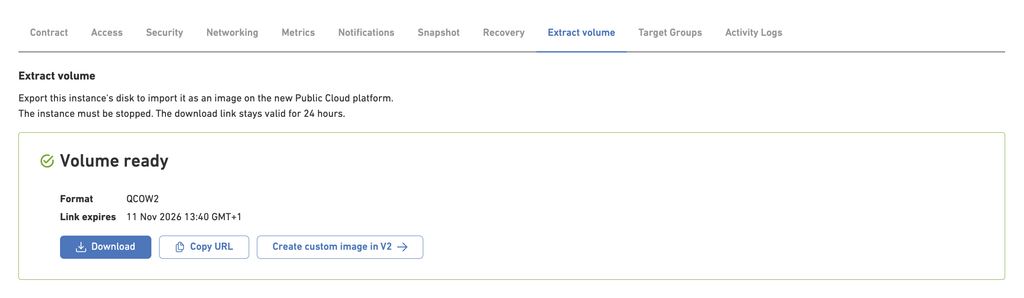
- Wait until Volume ready appears. It shows the disk format (QCOW2) and when the link expires.
From here you can:
- Download the disk to keep a local copy.
- Copy URL to use the link in the next step.
- Create custom image to go straight to new Public Cloud with the URL filled in.
Step 2: Create a custom image in Public Cloud [New]
- Click Create custom image, or go to Public Cloud [New] > Custom Images and click Create.
- Fill in the form:
- Image URL: the link from Step 1. It’s filled in automatically if you used the Create custom image button.
- Image Name and Description: anything that helps you recognize the image.
- OS Distribution, OS Version and Admin User: optional, but recommended. They help identify the image and set the right defaults when you launch instances.
- Disk Format: QCOW2.
- Click Create and wait until the image is available in the Custom Images list.
Step 3: Launch an instance in new Public Cloud
- In Public Cloud [New], launch a new instance.
- Select your custom image as the image source.
- Choose the instance type, region and network settings, then launch.
- Go to Public Cloud [NEW] > Public IPs and assign a public IP address to the new instance.
Step 4: Verify and switch over
- Log in to the new instance and check that your applications and data work as expected.
- Update DNS records, firewall rules and any configuration that refers to the old Instance IP addresses.
- When everything works, terminate the old instance to stop billing for it.
Troubleshooting
- The Extract volume button is disabled. The instance is still running. Stop it first.
- The image import fails. The link may have expired. Export the disk again and use the new URL.