Custom images let you launch Public Cloud instances from your own disk image, for example a disk exported from another platform or a pre-configured server template.
Before you begin
- Your image must be in RAW or QCOW2 format.
- The image file must be available at a publicly reachable HTTPS URL.
- V2 instances don’t get a public IP address automatically. You’ll need to assign one after launching the instance.
Step 1: Create the custom image
- Log in to the Customer Portal.
- In the menu, go to Public Cloud > Custom Images.
- Click Create custom image.
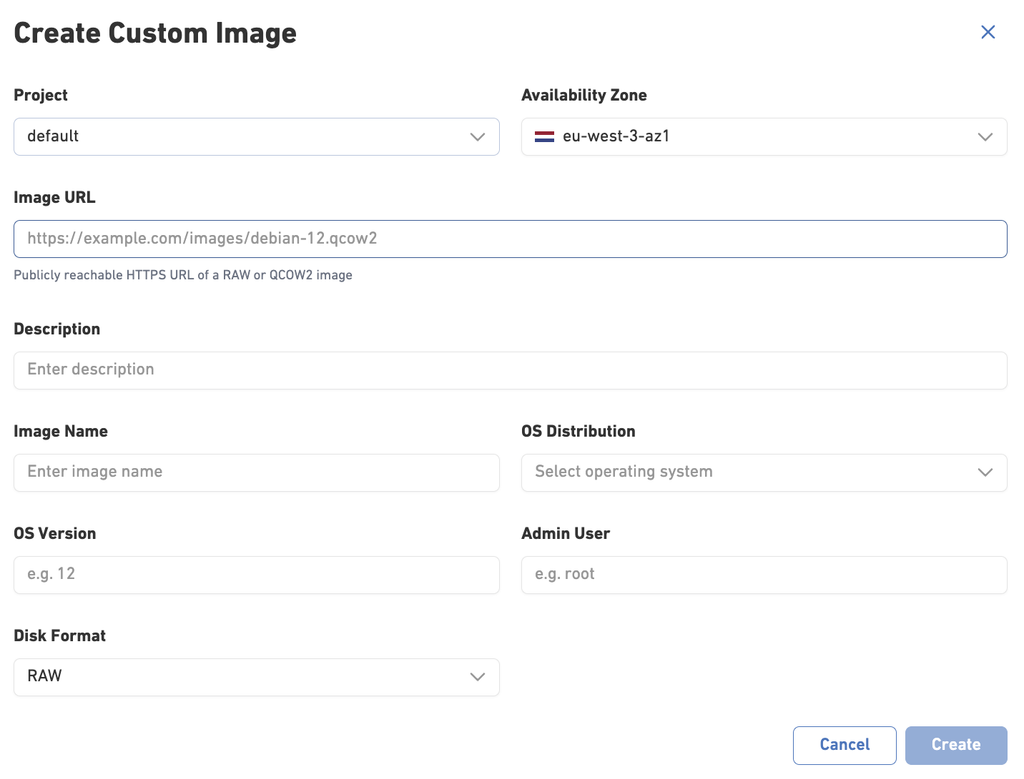
- Fill in the form:
- Project: the project the image belongs to.
- Availability Zone: the zone where the image will be available. Choose the zone where you plan to launch instances.
- Image URL: the HTTPS URL of your RAW or QCOW2 image file.
- Description: a short description of the image.
- Image Name: a name that helps you recognize the image.
- OS Distribution, OS Version and Admin User: optional, but recommended. They help identify the image and set the right defaults when you launch instances.
- Disk Format: select the format of your image file, RAW or QCOW2. This must match the actual file format.
- Click Create.
- Wait until the image shows as available in the Custom Images list. This can take a while for large images.
Step 2: Launch an instance from the custom image
- In Public Cloud V2, go to launch a new instance page, in the same project and availability zone as the image.
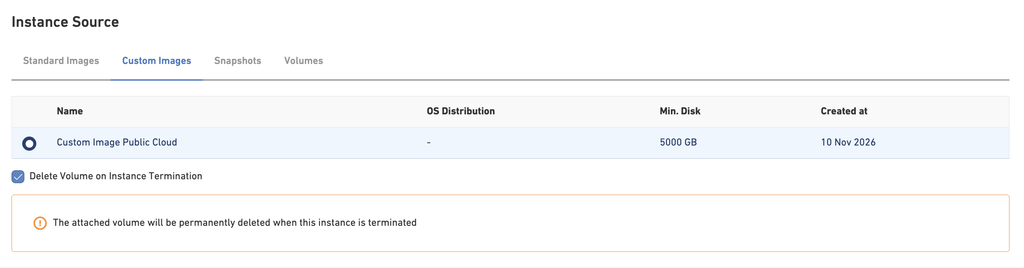
- Select your custom image as the image source.
- Choose an instance type with a disk at least as large as the image.
- Choose your network settings and launch the instance.
Troubleshooting
- The image import fails. Check that the URL is publicly reachable over HTTPS, the link hasn’t expired, and the selected disk format matches the file.
- You can’t find your image when launching an instance. Make sure you’re launching in the same project and availability zone as the image.
- You can’t reach the new instance. Check that a public IP is assigned and that your security settings allow the traffic