There are two ways to create a network in Public Cloud:
- From the Networks page
- Navigate to Public Cloud.
- Select Networks from the submenu.
- Click Create Network.
- During Instance Creation
- While launching a new instance, you can create and attach a network as part of the deployment process.
Filling in the Create Network Fields
- In the Leaseweb Customer Portal, navigate to your Public Cloud section
- Go to the Networks page:
- Navigate to Public Cloud.
- Select Networks from the submenu.
- Click Create Network.
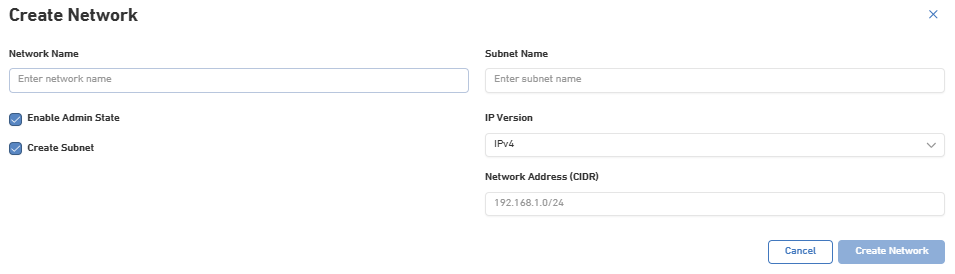
- Fill in the details as follows:
| Network Name | Enter a unique name for your network. Example: production-network |
| Subnet Name | Enter a name for the subnet that will be created within the network. Example: production-subnet |
| Enable Admin State | Determines whether the network is operational immediately after creation. – Enabled (recommended): Network becomes active and can be used by instances. – Disabled: Network is created but remains inactive until enabled later. |
| Create Subnet | When enabled, a subnet will be created together with the network. – Enabled (recommended): Creates both the network and subnet in a single step. – Disabled: Creates only the network. A subnet must be added later before instances can use the network. |
| IP Version | Determines whether it is IPv4 or IPv6 |
| Network Address (CIDR) | Defines the IP address range available within the subnet. Example: 192.168.1.0/24 |
Best Practice
For most users, the recommended configuration is:
| Field | Recommended Value |
|---|---|
| Network Name | Meaningful network name |
| Subnet Name | Meaningful subnet name |
| Enable Admin State | Enabled |
| Create Subnet | Enabled |
| IP Version | IPv4 or IPv6 |
| Network Address (CIDR) | 192.168.1.0/24 |
After a network is created, it can be used when launching instances, allowing them to connect to the network. If external connectivity is required, the network can also be attached to a router.