Using Floating IPs in combination with a virtualisation layer can be challenging. For standard Dedicated Servers that run an Operating System (and no Virtual Machines), using Floating IP’s is relatively easy to configure and use.
Most of the times it doesn’t make any difference whether the IP address is floating or not. But extra steps need to be taken if you plan to use your Floating IP range with dedicated servers that run virtual machines (that act as hypervisors). In this artice we’re going to explain how to use floating IP range with Linux hypervisor using Proxmox VE as an example.
The difference between regular IP address and floating IP address
TLDR: the normal IP address are bridged, while floating IP addresses are routed.
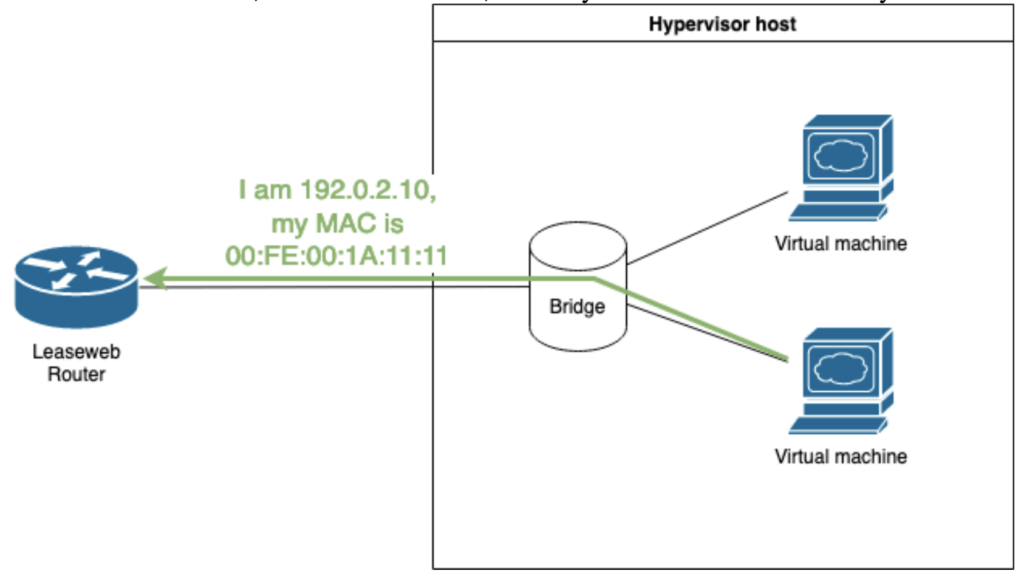
Virtualization solutions, such as Proxmox VE, connect your virtual machines directly to the network via bridge. They expect all the IPs to be available within the same layer 2 segment:
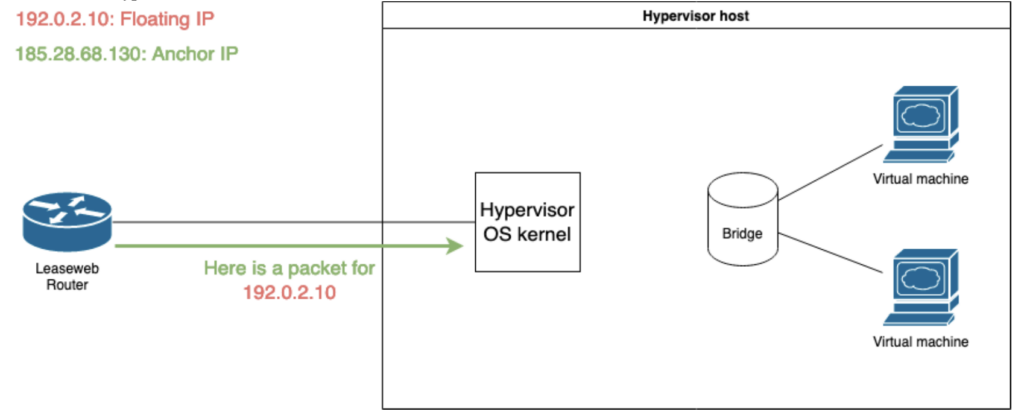
However, the floating IPs are always routed to the anchor IP. In other words, Leaseweb router sends the traffic destined for the Floating IP to its anchor IP, expecting it will be forwarded further. In this case, a virtual machine host (hypervisor) must act as a router:
Configure Proxmox to route subnets of an announced range
You announced the whole range (e.g. 192.0.2.0/24) via Leaseweb. That gives you 256 Floating IP addresses.
Most likely, you want to split it over multiple hypervisors (proxmox servers). Something like this:
- The subnet 192.0.2.0/26 (192.0.2.0-192.0.2.63) goes to the hypervisor called Proxmox1
- The subnet 192.0.2.64/26 (192.0.2.64-192.0.2.127) goes to the hypervisor called Proxmox2
- The subnet 192.0.2.128/26 (192.0.2.128-192.0.2.191) goes to the hypervisor called Proxmox3
- The subnet 192.0.2.192/26 (192.0.2.192-192.0.2.256) goes to the hypervisor called Proxmox4
Of course, it is also possible to route the entire subnet to a single server.
Configure a Proxmox server
1. By default, Linux doesn’t perform routing. To enable it, create a file /etc/sysctl.d/10-routing.conf containing the following line:
net.ipv4.ip_forward = 1Apply it with the command:
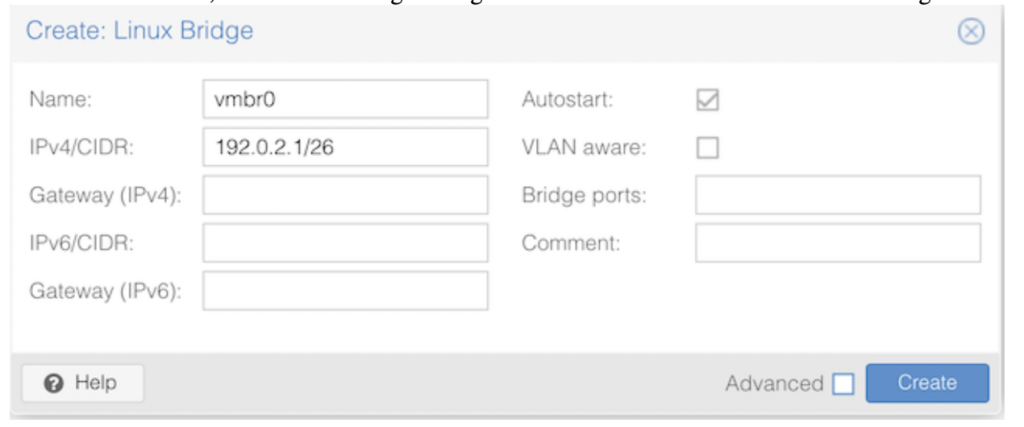
sysctl --system2. In Proxmox web UI, create a new bridge. Assign the first usable IP of the subnet as the bridge IP address, do not specify the gateway, and do not add any ports to the bridge:
3. In Leaseweb customer portal, route the subnet 192.0.2.0/26 to Proxmox1 anchor IP:
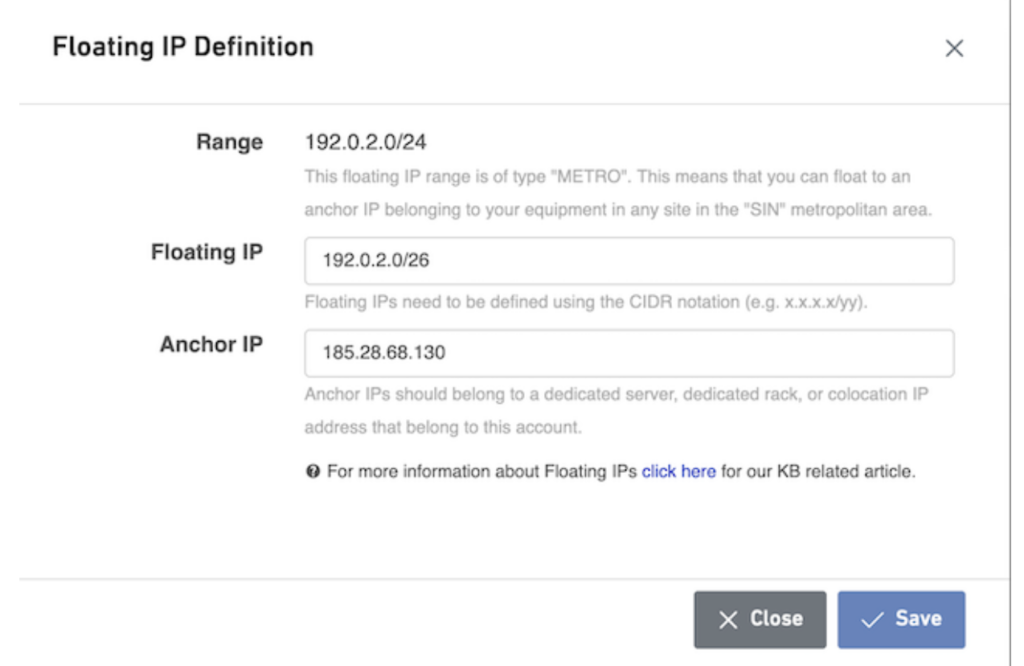
Routing the first subnet 192.0.2.0/26 to the first Proxmox server IP
4. Once the steps above are done, you can start creating virtual machines with the following network settings:
Bridge name (specified during virtual machine creation): vmbr0
IP address: anything in range 192.0.2.2-192.0.2.62
Subnet mask: 255.255.255.192 (or /26)
Gateway: 192.0.2.1
DNS servers: 23.19.52.52, 23.19.53.53
5. Repeat the steps above for the rest of proxmox servers.
Conclusion
Despite floating IPs were not initially designed for virtualization, after leveraging some tricks we can make it work so.
The how-to above is made for Proxmox, but can also be applied to any Linux-based hypervisor.
Note.: VMWare ESXi, however, seems to only work in Layer 2 bridge (vswitch) mode. Thus, they can not be used together with Floating IPs.