1 min read
Routers allow your private networks to communicate with external networks, such as the internet, and route traffic between connected networks. The steps below explain how to create a router and what actions you can take afterwards:
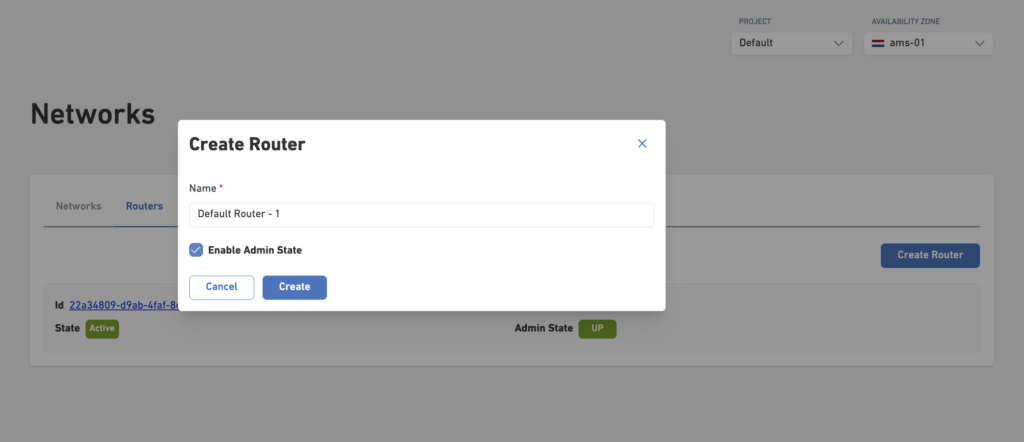
- Navigate to Public Cloud.
- From the left-hand menu, select Networks.
- Under Networks, you will see two tabs: Networks and Routers
- Select the Routers tab.
- Click Create Router.
- The Create Router dialog will appear.
- Configure the Router
- Fill in the following fields:
- Name
- Enter a unique and descriptive name for your router.
- Enable Admin State
- Leave enabled to make the router operational immediately after creation.
- Name
- Fill in the following fields:
- Click Create.
Your router will now be created and will appear in the Routers overview page.
Next Steps
After creating the router, you can:
- Connect one or more networks to the router.
- Configure routing between networks.
- Attach an external gateway to provide internet connectivity for instances within your network.
Information
Creating a router alone does not provide internet access. You must connect the router to a network and configure an external gateway if internet connectivity is required.
Next step: Follow the guides below to allocate a Public IP address and connect the router to your network by creating a router interface for the subnet. Once completed, your instances can communicate with the internet (subject to the appropriate routing and security group rules).