3 min read
This article explains how to create and configure a security group for your Public Cloud Instances.
 A security group acts as a virtual firewall for your Public Cloud instances, allowing you to control inbound and outbound traffic.
Prerequisites
- Access to the Customer Portal account
- Enabled Leaseweb Public Cloud account.
Steps to Follow
- Log in to the Customer Portal
- Open your browser and go to the Customer Portal.
- Sign in with your Leaseweb account credentials.
- Navigate to Security Groups
- From the left-hand menu, go to Public Cloud.
- Under the submenu, click Security Groups.
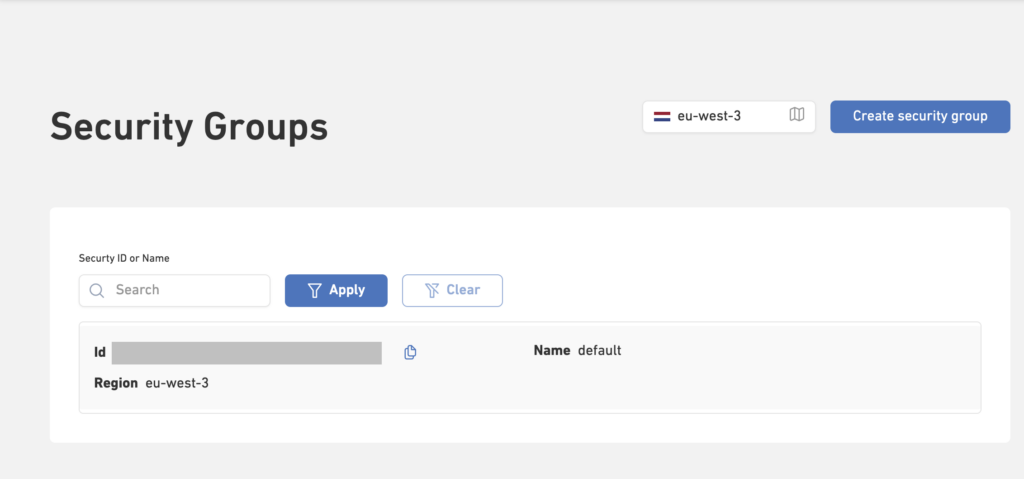
- You will see a list of all available security groups within the current region
- Create a New Security Group
- Click the Create Security Group button.
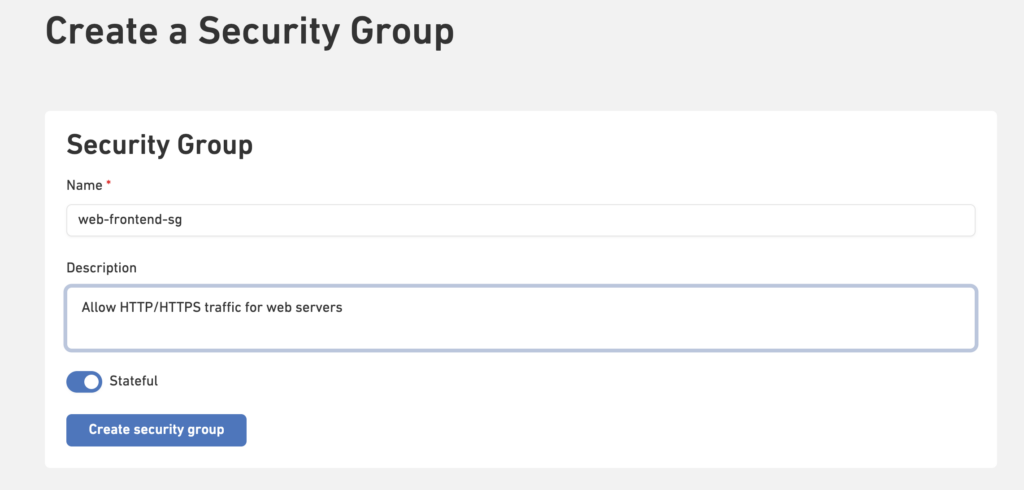
- Fill in the details:
- Name: Provide a descriptive name (e.g.,
web-frontend-sg). - Description: Briefly explain the purpose (e.g., “Allows HTTP/HTTPS traffic for web servers”).
- Stateful: The system remembers the traffic that has been allowed and automatically authorizes the return flow without needing to configure an explicit rule in the opposite direction.
- Name: Provide a descriptive name (e.g.,
- Add Firewall Rules
- Click on the security group, to access the security group details.
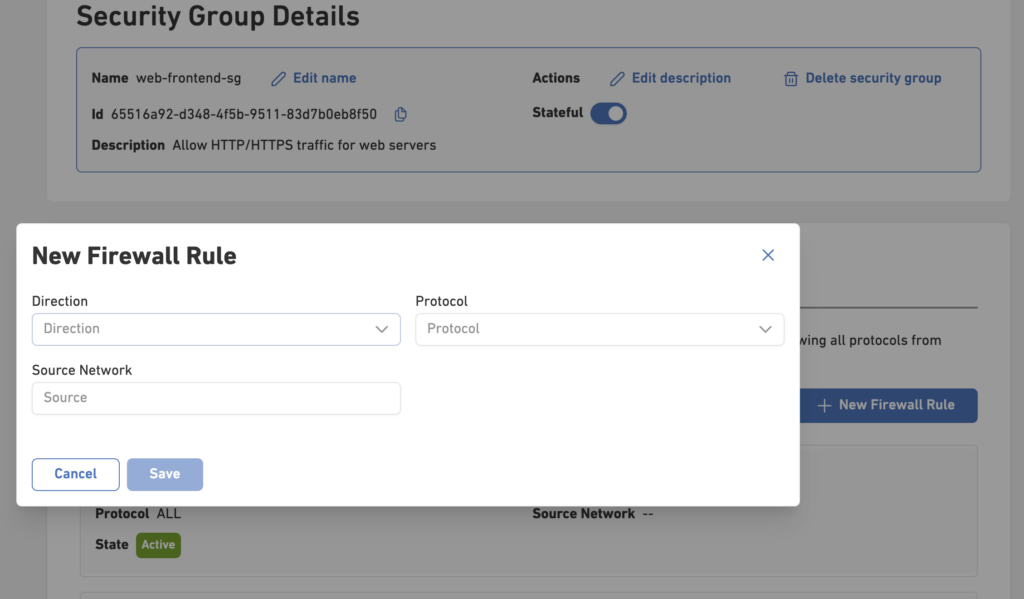
- Click + New Firewall Rule.
- A pop-up window will appear
- Select the Protocol from the dropdown (TCP, UDP, ICMP, or ALL)
- Enter:
- Direction: Select ingress or egress traffic direction.
- Source Network: Define the IP/CIDR that can access.
- Click Save to add the rule.
- Save the Security Group
- Once you’ve added the necessary rules, click Create Group.
- Your new security group will now appear in the list

How to Attach a Security Group While Launching an Instance
- Navigate to Public Cloud -> Instances
- Launch a New Instance:
- Click Launch an Instance.
- Enter a name for your instance.
- Select an OS image.
- Choose an instance type.
- Attach a Security Group:
- In the Security Groups section, click Attach Groups.
- Select a security group that has already been created.
- Click Confirm.
- Your selected security group will now be attached to the instance.
- Continue with the remaining steps to launch your instance.
How to Attach a Security Group to an Existing Instance
- Go to your Instance Details page.
- Navigate to the Security tab.
- Stop the instance if it is currently running
 Security group changes can only be applied when the instance is stopped.
- Click on Attach Security Groups:
- A list of available security groups will appear.
- You can select one or multiple groups to attach.
- Already attached groups will be marked as selected or greyed out.
- After choosing the desired security groups, click Confirm to apply the changes.
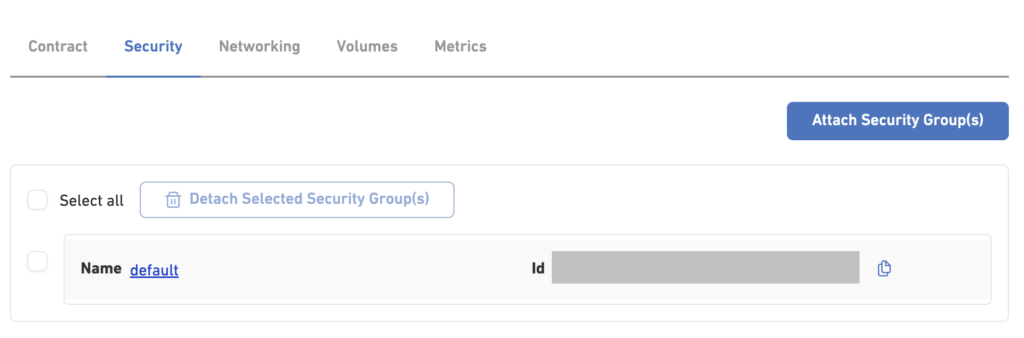
How to Remove Security Groups from an Instance
- Go to your Instance Details page.
- Navigate to the Security tab.
- Select the security groups you want to remove.
- Click Detach Selected Security Group(s).
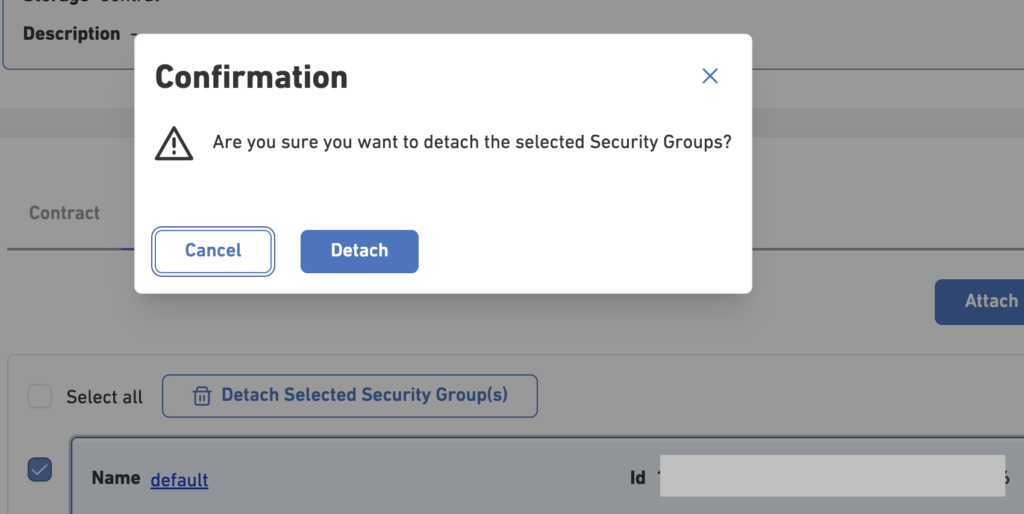
- A confirmation message will appear: “Are you sure you want to detach the selected Security Groups?”
- Confirm by clicking Detach again.
- The selected security groups will be removed from your instance.