Overview of Domain Names and Web Hosting Packs
The Overview page shows you all the Domains and Web Hosting packs under your account. All the actions regarding your domains can be performed directly from here: DNS Records, Nameserver, and Email Management.
Information
Leaseweb will display suspended domains in red, and no action is allowed for them.
Domains displayed in yellow are currently pending registration, and only a few actions are allowed for them.
Registering a new Domain
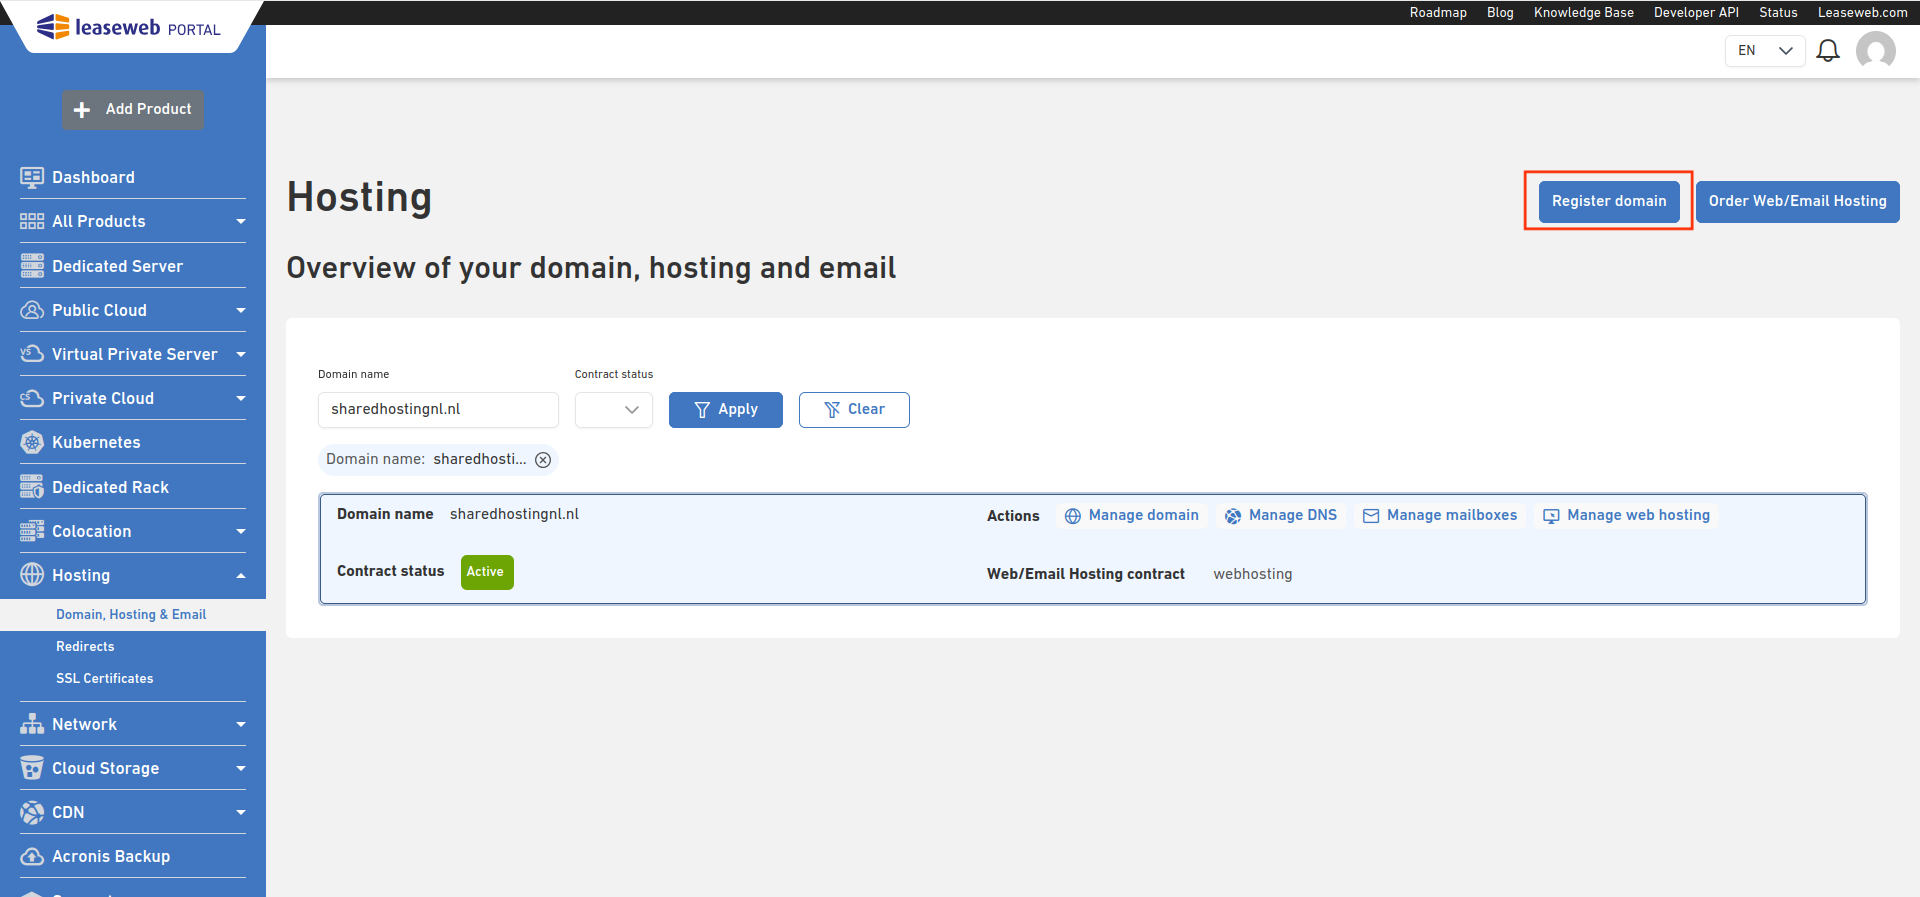
- In the Hosting overview page, you can click on the Register Domain(s) button.
- Type the domain name you want to register
- We will check the availability of the domain. If the domain is free, you can order it by clicking on Order domain. If you want to transfer the domain from another provider, click on Transfer to Leaseweb.
Information
Authorization Code
If you select to transfer a domain to Leaseweb, you will be asked for the Authorization code, which you can request from your previous provider.
- You will also see a list of suggestions for the most common extensions, which you can also add to your order by clicking on Order domain or Transfer to Leaseweb.
- After you have chosen all the extensions you want to register or transfer, click on Continue.

- If you have selected to transfer a domain, you will be asked to insert the Authorization code. Then, click Next.

- In the Summary page, you can see your complete order. Please read and accept the Terms & Conditions, and click Submit to place your order.

- You should get a message indicating that the operation was successful.

In a few minutes, your domain should be visible on the Hosting Overview page. If anything goes wrong, please try again in a few minutes. If the error persists, contact our support team.
Retrieving Authorization Code
Retrieving Authorization Codes is available in the Hosting module of the Customer Portal.
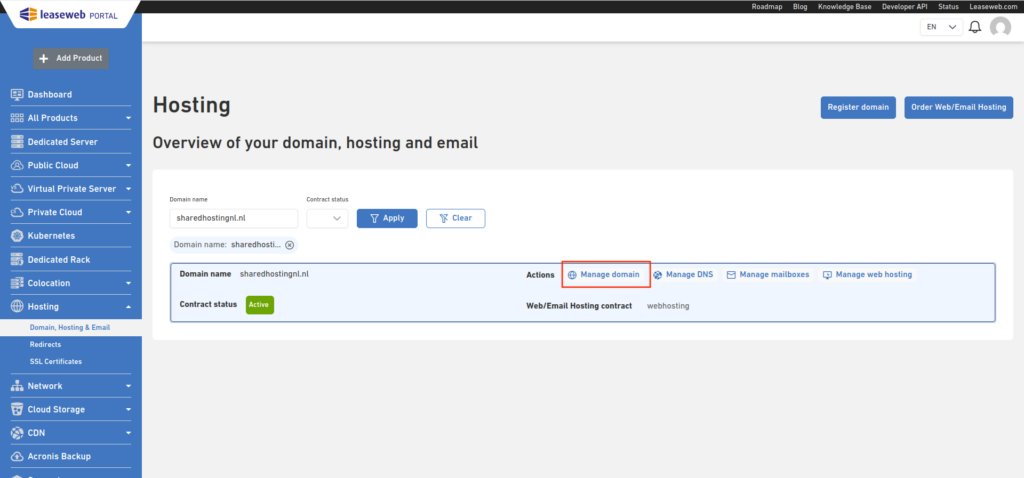
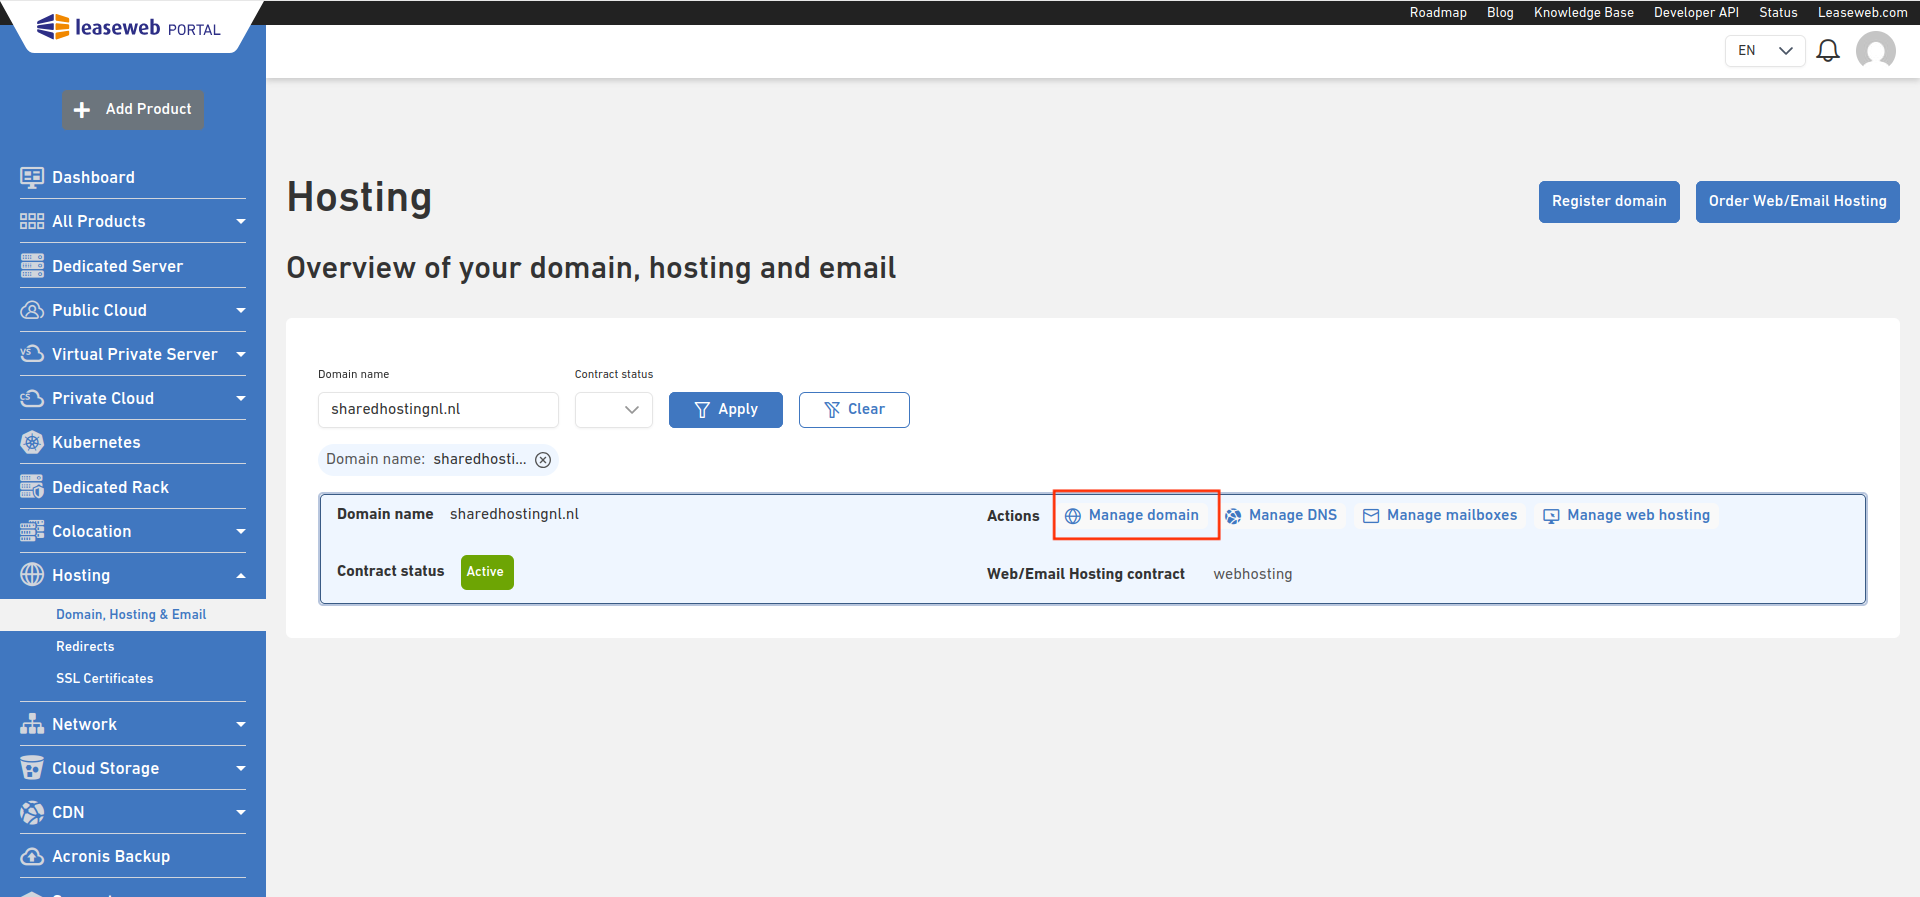
- In the Hosting overview page, click on the Manage Domain
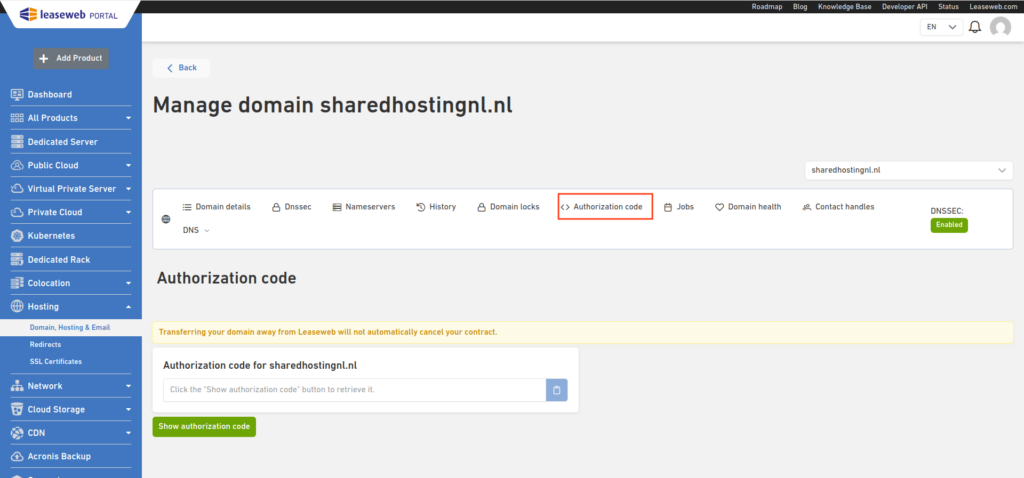
- Click the Authorization Code link of the domain for which you want to retrieve the authorization code
 Authorization codes for suspended domains cannot be retrieved
- The authorization code for the domain will be displayed
Warning
When the authorization code is used to transfer your domain away from Leaseweb, please remember to also cancel your contract at the All Services Page.
Managing Nameservers for your domains
Nameserver management is available in the Hosting module of the Customer Portal.
- In the Hosting overview page, click on the Manage Domain
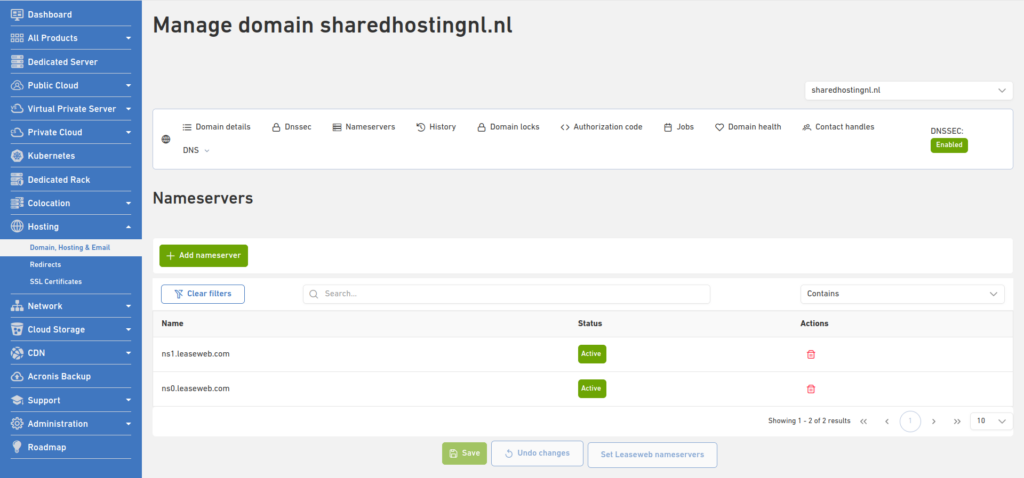
- Click the Nameservers link of the domain you want nameservers to be edited for
 Nameservers for suspended domains cannot be managed

- The list of nameservers currently configured for that specific domain will be displayed
- You can freely edit the list, delete nameservers, or add up to ten nameservers to it
 Only valid domain names will be accepted as nameservers.
Manage Domain Locks
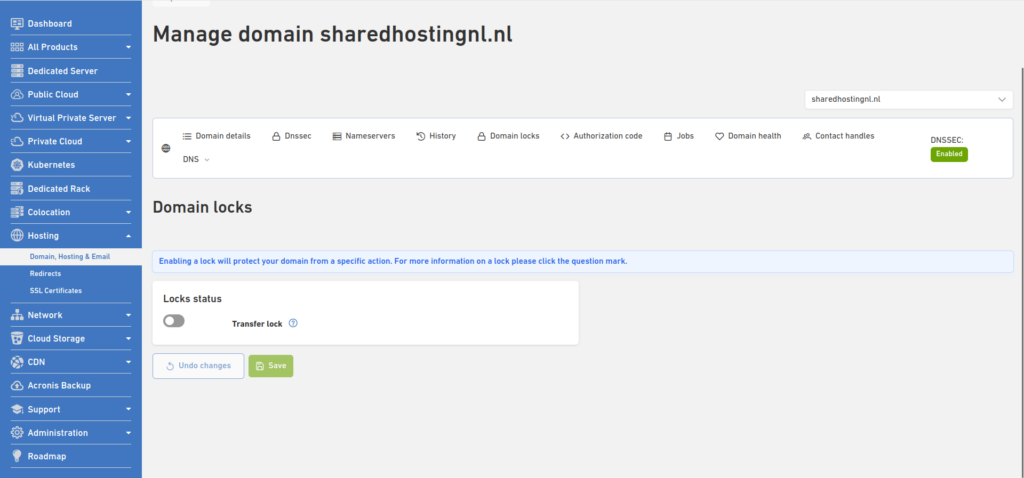
A domain lock is a security setting that prevents unauthorized attempts to transfer your domain to another registrar. While your domain is locked, you can update your contact information and make other changes to your domain settings.

Transfer lock
Information
A transfer lock is sometimes called a registrar lock or even a domain lock. In essence, the transfer lock is a way to prevent your domain from getting stolen or deleted. Just about every domain can be protected using the transfer lock.
Here you can enable “Transfer Lock” for your domain:
Editing your DNS records
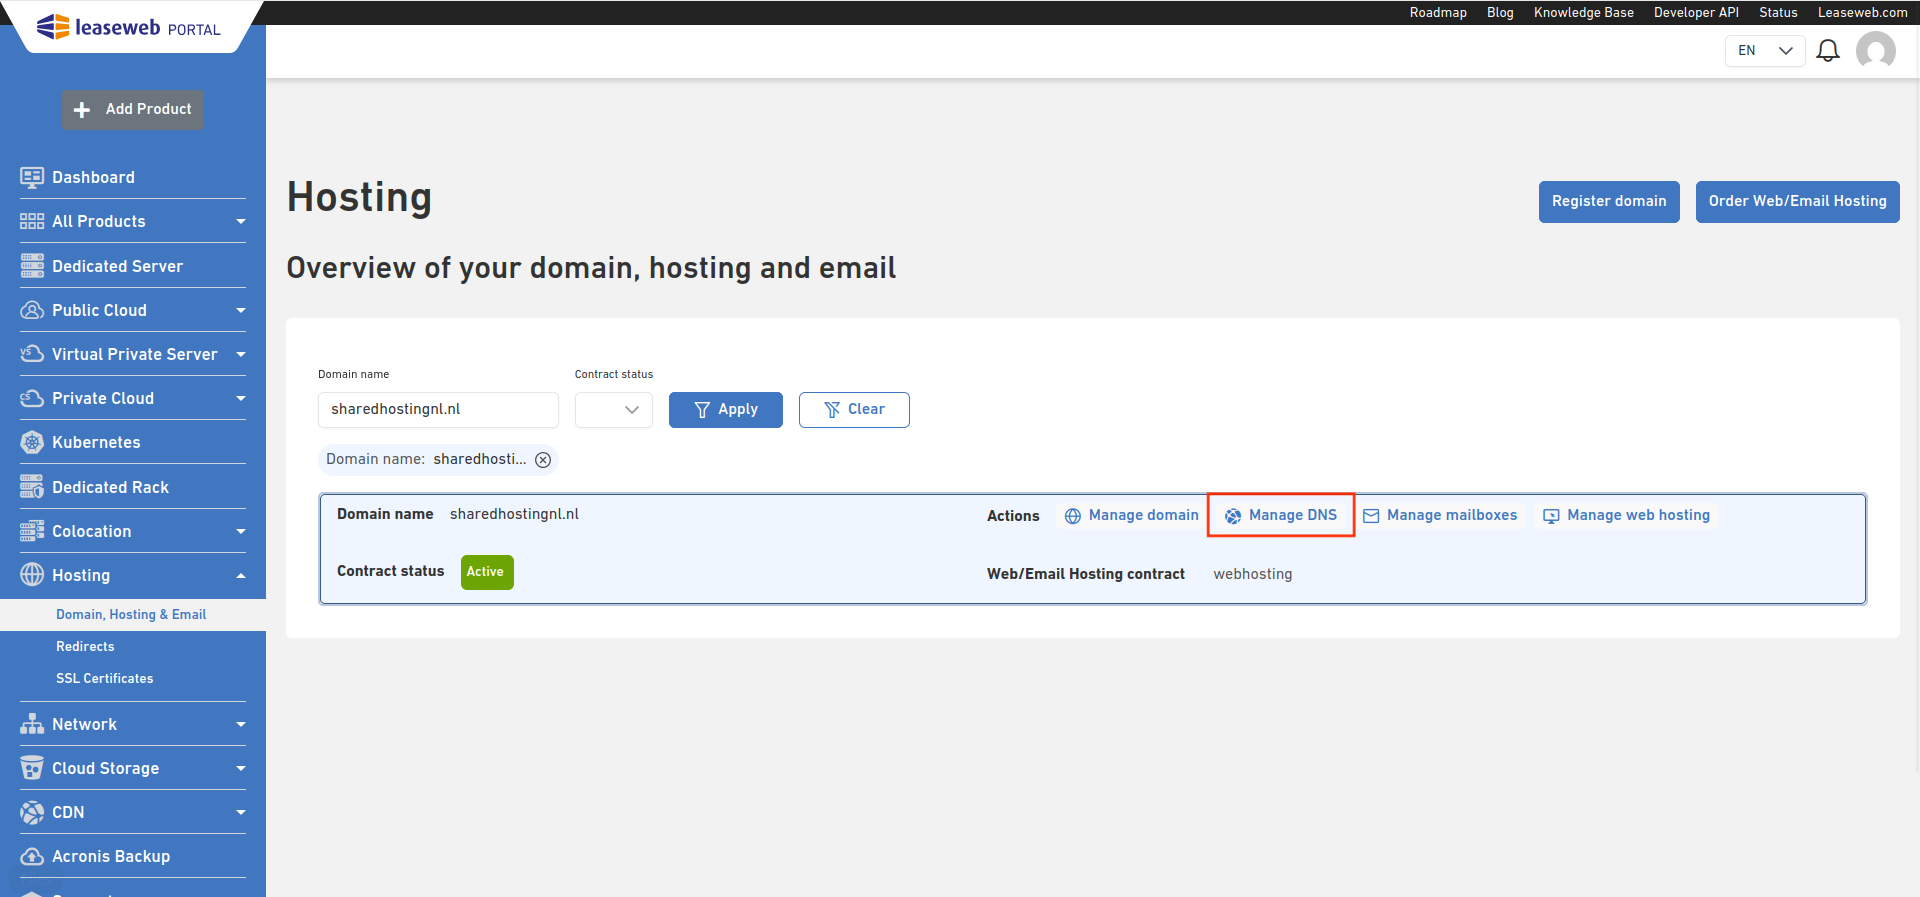
- On the Hosting overview page, click the Manage DNS link to edit your domains’ DNS records:
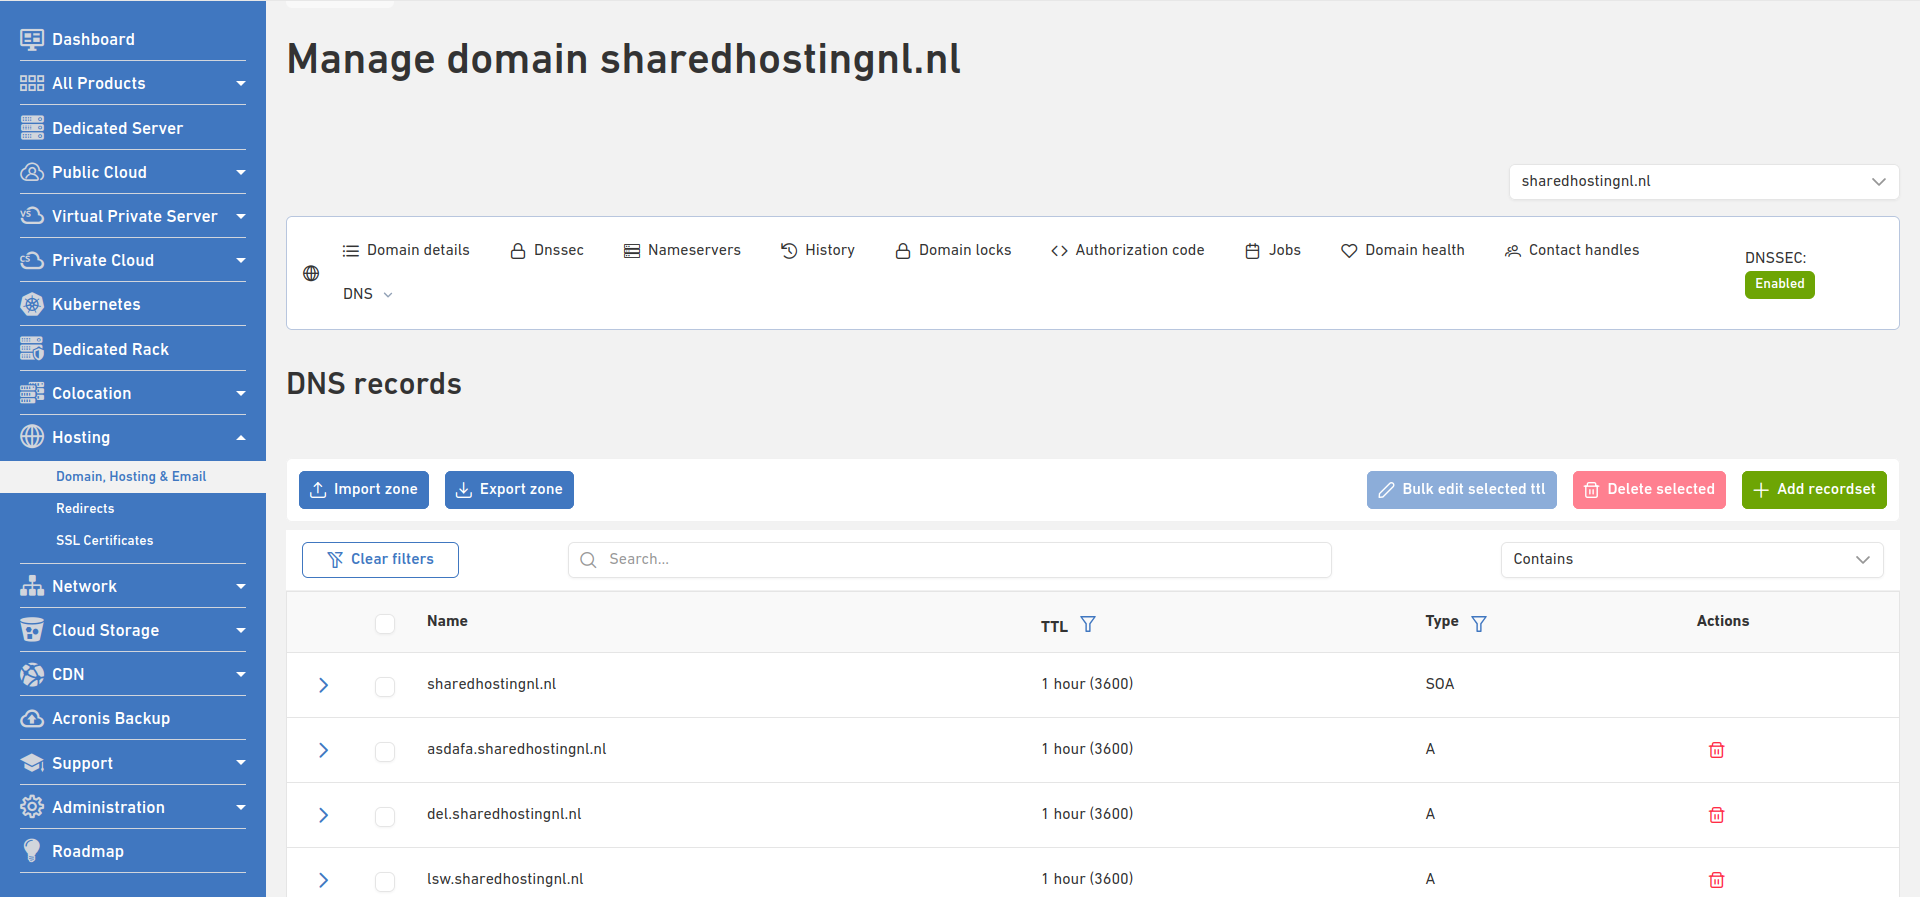
- You can now see all DNS records for the domain you have chosen.
Information
From this screen, you can either delete a DNS Record entry, add a new one, or edit an existing one.
For changing DNS record sets highlighted in blue, our customer support should be contacted. You can do this by clicking on the Request Change link in order to create a ticket.
Adding a new DNS record
- On the DNS Records list page for a domain, click on the Add button:
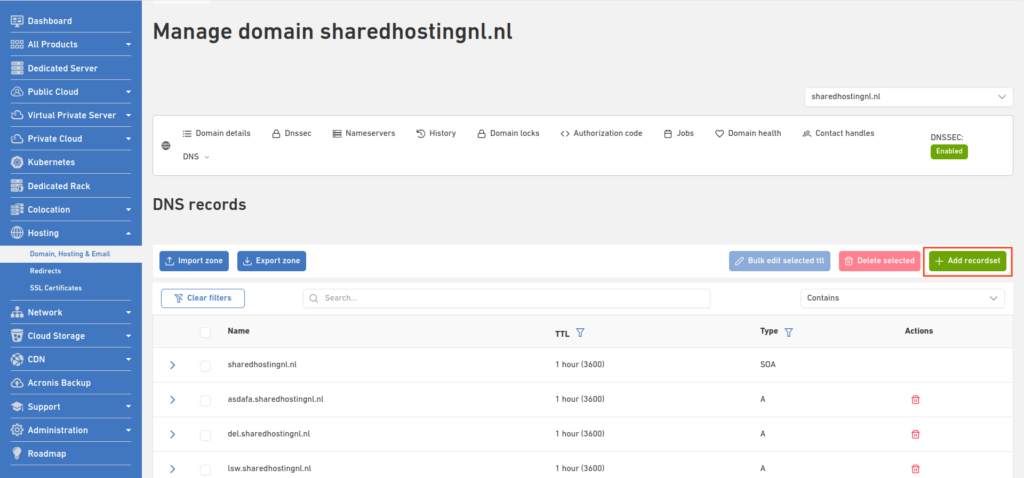
- Add Name and Type for the new Record Set, and click on Continue.
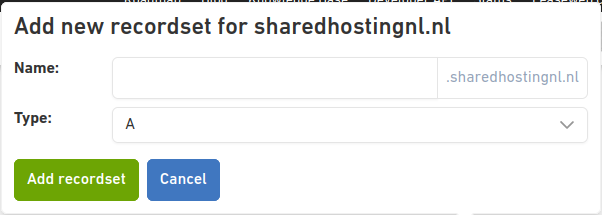
- Go to the Editing a DNS Record -> step 2.
Editing a DNS record
- In the DNS Records list page for a domain, open the accordion and click on the Edit icon for a set:
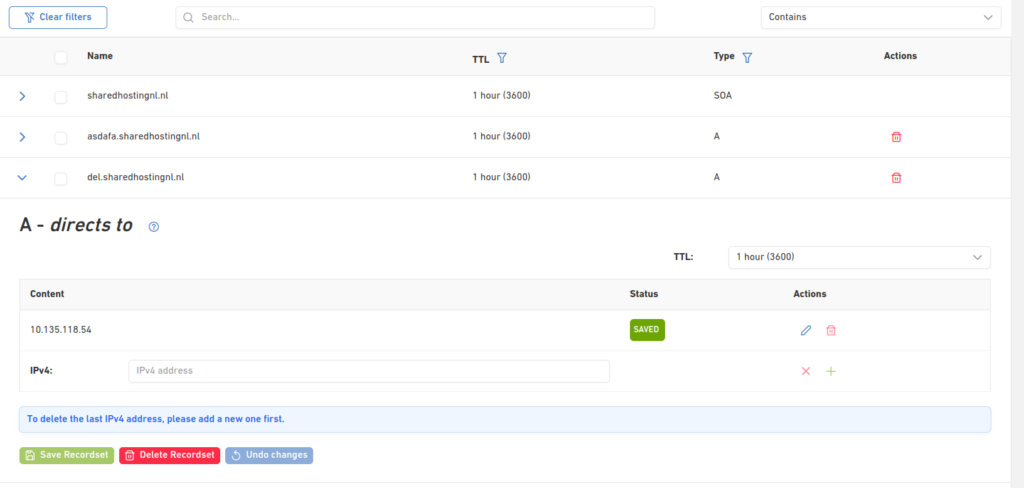
- The details for the selected record set are displayed
Information
The details for each record set may be different. Please refer to our page on DNS records for more information on each of them.
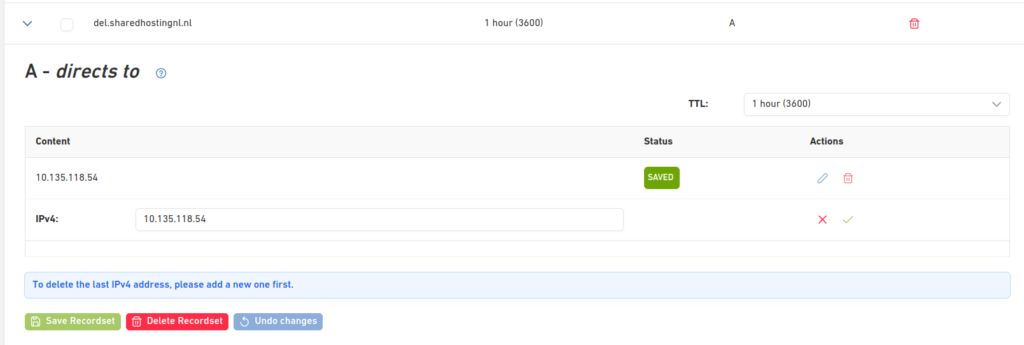
- To update the record to the set, click the Edit button (Step 1). Edit the already existing value
- When done editing the details for the new entry, click on the check mark to save the record, and then click Save Recordset
- Set the TTL for this record set.
Information
“TTL” refers to the Time to Live of the domain.
It determines the amount of time that it will take for a DNS record change to propagate across the Internet. We advise lowering the TTL before making a DNS record change and setting it back to 24 hours once the changes are online. Please check the Domain Name Overview for more information on the TTL settings.
- When you finish editing all your entries, you need to press Save to have them set:
Warning
Remember to save the changes to your settings after updating the records, otherwise they will be lost!
Deleting a DNS record
- On the DNS Records list page for a domain, click on the Delete icon:
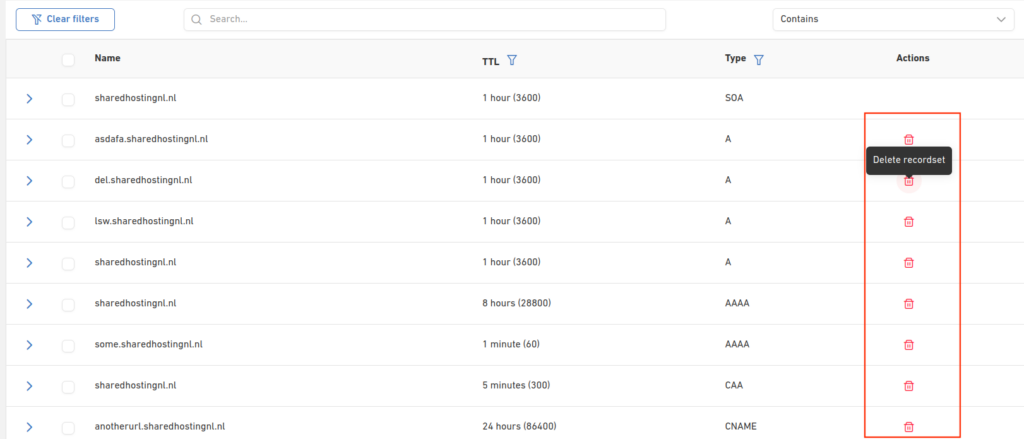
- A confirmation pop-up will show -> click Yes to proceed:
- Alternatively, you can select multiple sets in the Record Set list page. Tick the check boxes for the set you want to delete, and then click on Delete:
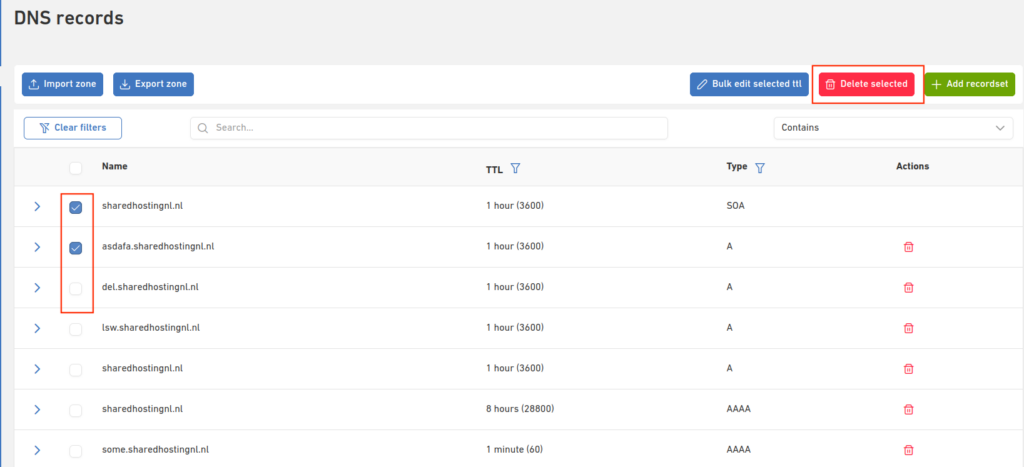
- A confirmation pop-up will show -> click Yes to proceed:

Information
Please note that when adding a traffic policy for your A record, the default DNS record will still be available.
Enabling DNSSEC for your domain
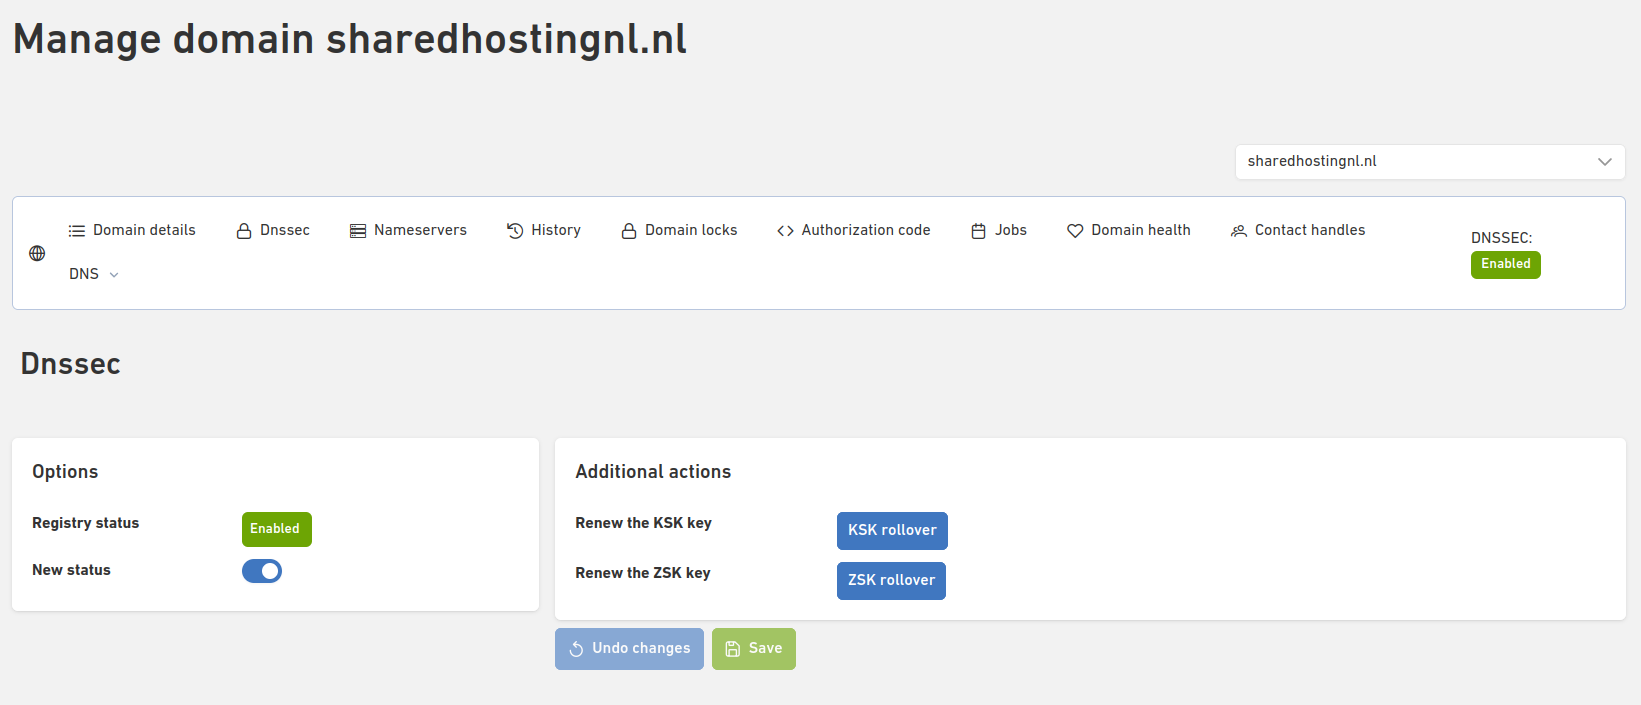
- On the Hosting overview page, click the Manage Domain and then click the DNSSEC link to edit your domains’ DNSSEC
- For domains with Leaseweb name servers, you can now see all DNS records for the domain you have chosen. On the top of the screen, there is a DNSSEC enabling switch to make it On/Off, and a New Status label:
- For domains with external nameservers
- The supported Flags are 256/257.
- At the moment, we support the following algorithm: 7, 8, 10, 13, 14.
- Customers can now insert their own key.
- At the moment, we support protocol 3.

Warning
- If you disable DNSSEC for a domain, please note that you cannot re-enable it for 25 hours.
- You can enable DNSSEC for most domains, as long as they use Leaseweb nameservers.
- For domains enabled in the Customer Portal, NSEC records are used by default. Please refer to our APIs if you want to have DNSSEC with NSEC3 enabled.
Enabling DNSSEC with delegation for your subdomain
- On the Record Set Management page for your parent DNSSEC-enabled domain, add an NS record for the subdomain (sub-zone) for which you want delegation.

- Add a DS record for the same subdomain (sub-zone).

Managing Contact Handles
- From the Hosting Overview page, select the domain for which you want to manage the contact information
- Click on the Manage Domain -> click on the corresponding Contact Handles link:

- You will access the edit page for all the contact handles, where you can find information for Registrant, Administrative, and Technical contacts
- All fields marked in red are mandatory, and you will not be allowed to save anything if they are not fulfilled.
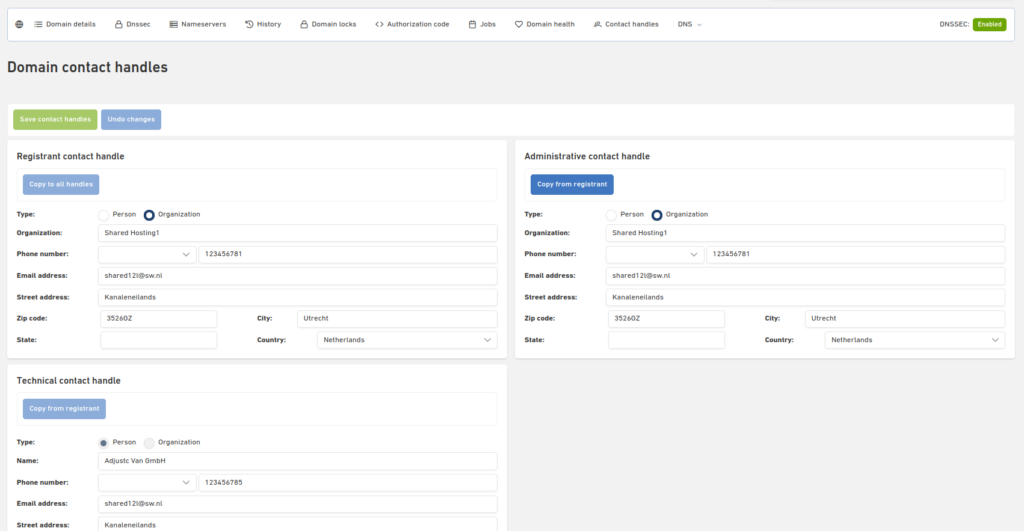
- For the Administrative and Technical contacts, you can use the Copy from Registrant function, which will automatically copy all fields from the Registrant contact:


