From the Leaseweb Customer Portal, you can enable and disable a DKIM for your domain mailboxes. If the domain’s DNS is managed by Leaseweb, then the DKIM record is automatically added to the DNS. If not, you need to manually add the record to your DNS provider.
Viewing DKIM Record
- In the Customer Portal left panel, under Hosting, select Domain, Hosting & Email.

- From the Hosting Overview page, search for the domain you want to manage and then click the Manage Mailboxes link under the Actions column.
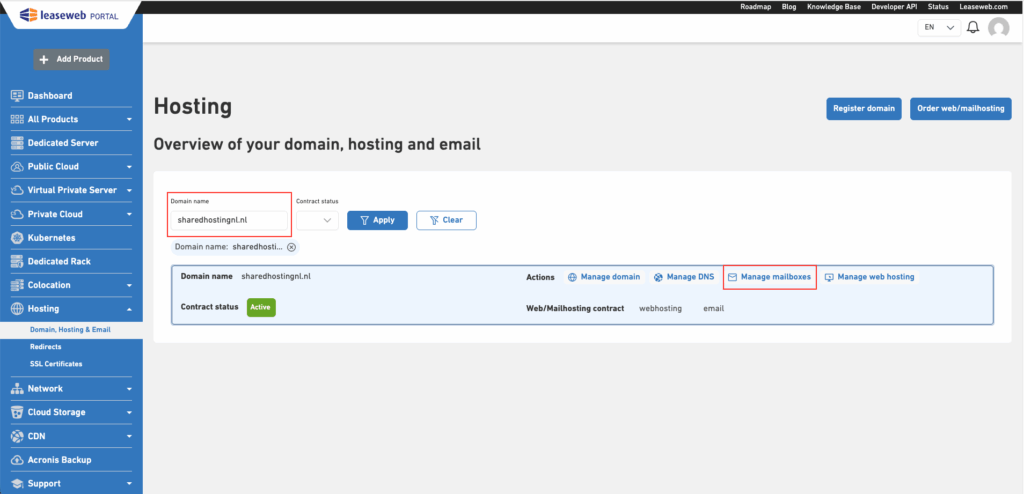
- Select DomainDKIM.
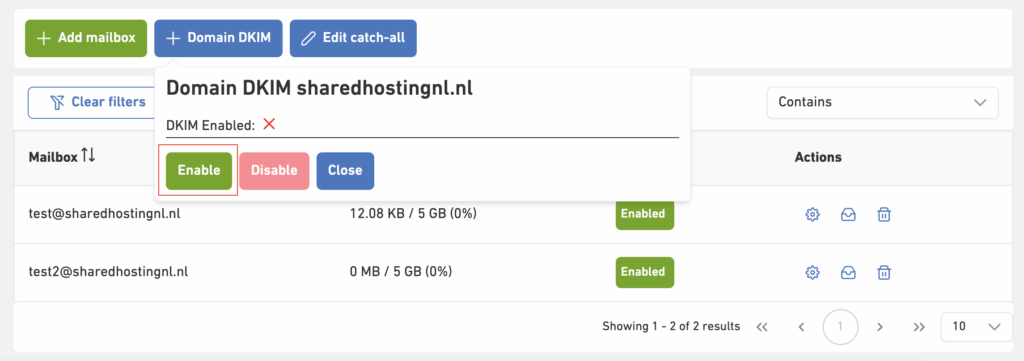
- When DKIM is not already enabled, you will see the following screen:
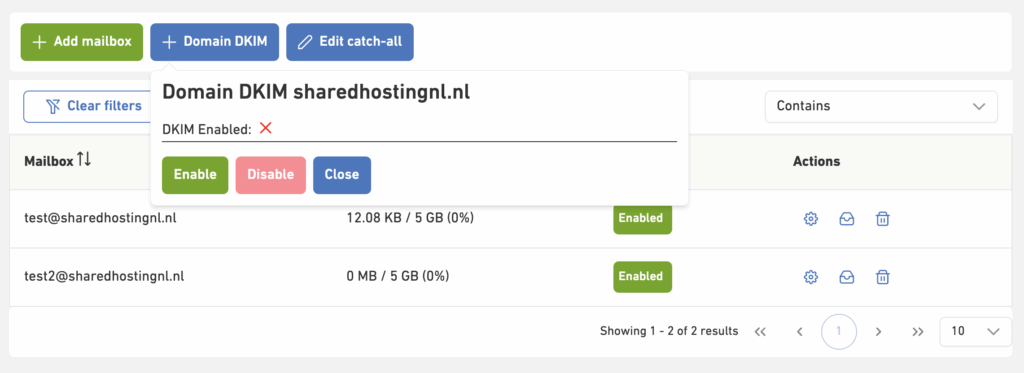
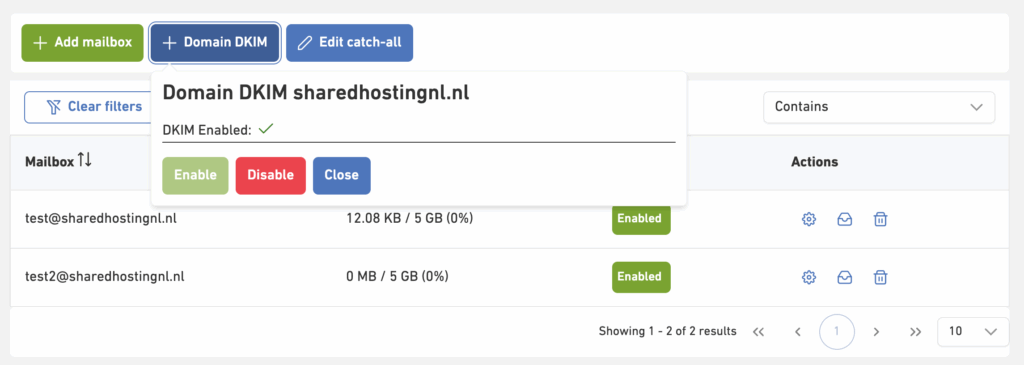
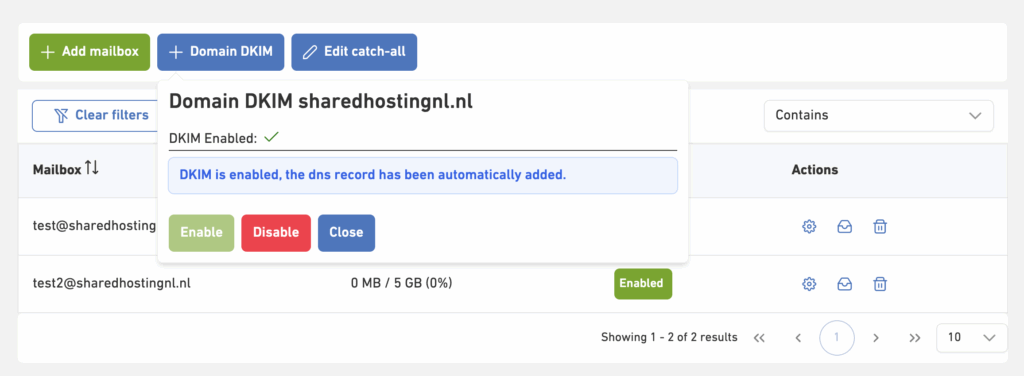
- When DKIM is enabled and DNS is managed by Leaseweb, you will see the following screen:
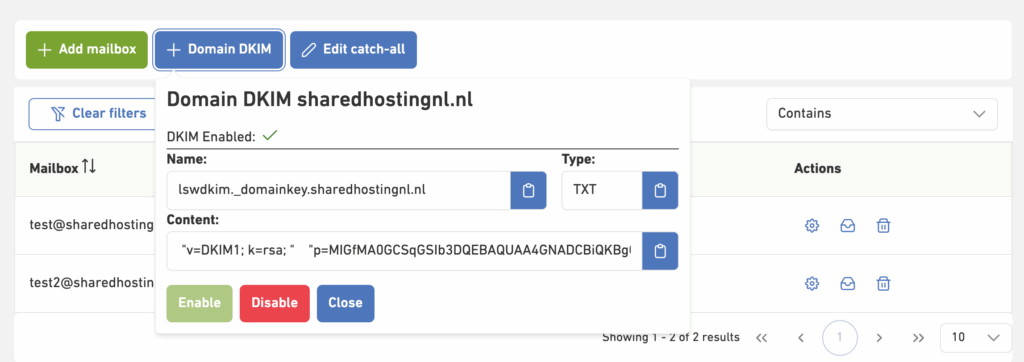
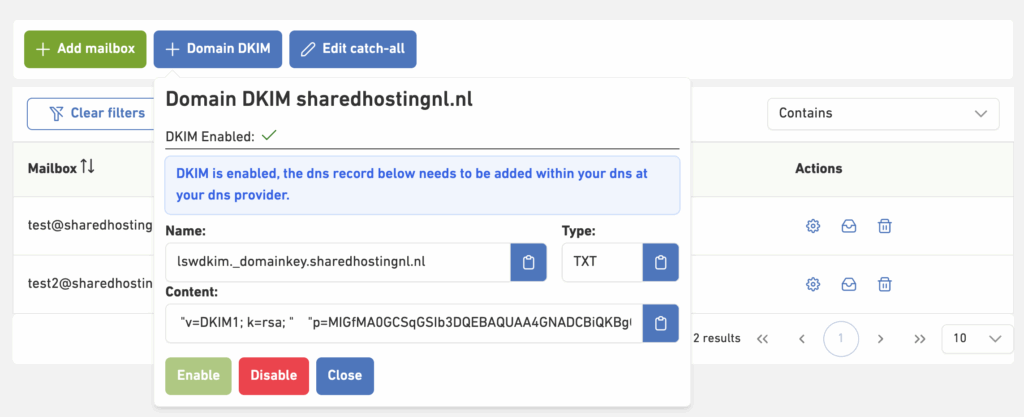
- When DNS is not managed by Leaseweb, you can configure the DNS record as provided,
- When DKIM is not already enabled, you will see the following screen:
Enabling DKIM
DNS Managed by Leaseweb
- Select Domain DKIM on Manage Mailboxes page,

- Click on Enable to generate and enable DKIM.
- DKIM will be enabled, and a DNS record will be automatically added for you.
External DNS Provider
- Select DKIM Record on Manage Mailboxes page.

- Click on Enable to generate and enable DKIM.

- DKIM is enabled and DKIM records are displayed. Copy and manually add the DNS records to your DNS provider.
Disabling DKIM
DNS Managed by Leaseweb
- Select Domain DKIM on Manage Mailboxes page,

- Click on Disable to disable DKIM and confirm with ✅ on the confirmation dialogue.
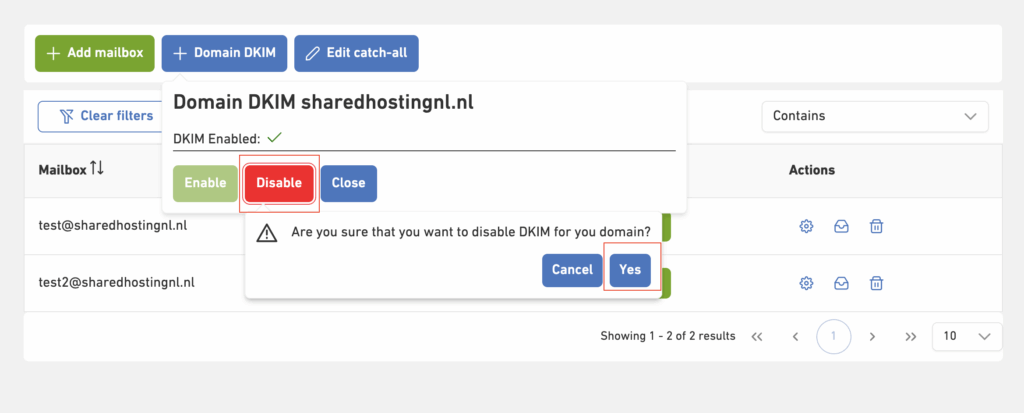
- DKIM is disabled successfully
External DNS Provider
- Select DKIM Record on Manage Mailboxes page,

- Click on Disable to disable DKIM and confirm with ✅ on the confirmation dialogue.
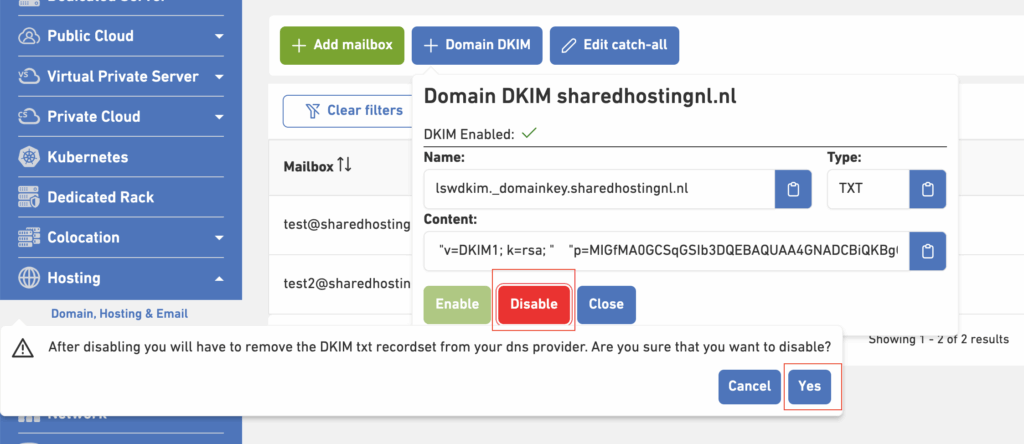
- DKIM is disabled successfully. You can manually remove the Leaseweb DKIM records from your DNS provider