Get started with your new Object Storage account. Find out how to create users, buckets, access keys and more using our user-friendly object storage portal.
Before using Object Storage
Important
“us-east-1” is a default region name without correspondence with an actual geographical region.
It exists for compatibility reasons as most programs and scripts are using this region by default.
Make sure to modify the programs and scripts to use the correct regions.
It must not be used, and any data stored on us-east-1 will be actually stored in the nl-01, de-01, uk-01 or us-01 region depending on the location of your Object Storage package.
S3 API endpoints
The available endpoints for the S3 API are:
| Entity/Region | S3 API Endpoint |
|---|---|
| nl-01 region | https://nl.object-storage.io |
| de-01 region | https://de.object-storage.io |
| uk-01 region | https://uk.object-storage.io |
| us-01 region | https://us.object-storage.io |
| ca-01 region | https://ca.object-storage.io |
| sg-01 region | https://sg.object-storage.io |
You need to configure your S3 compatible application to access your buckets and objects by using the above endpoint, together with the API Key ID and Secret obtained by following the steps described below.
Using object storage
You can use your object storage pack by going to the Leaseweb Customer Portal. Here you can manage your pack by creating access keys, users and groups.
Log into the Leaseweb Customer portal
After logging into the Leaseweb Customer Portal click on Object Storage on the left side. This will show you, your active pack(s).

Here you can see the equipment id (12345678) and the committed space. Click on the blue Manage button to manage your object storage pack.
Create S3 access keys
To be able to store and retrieve files in buckets you first need to create a S3 access key. Click on Access Keys and here by default access keys are added to the Root user who has all permissions. If you created any users under the Users tab this can also be selected from the dropdown box to create access keys for a different user.
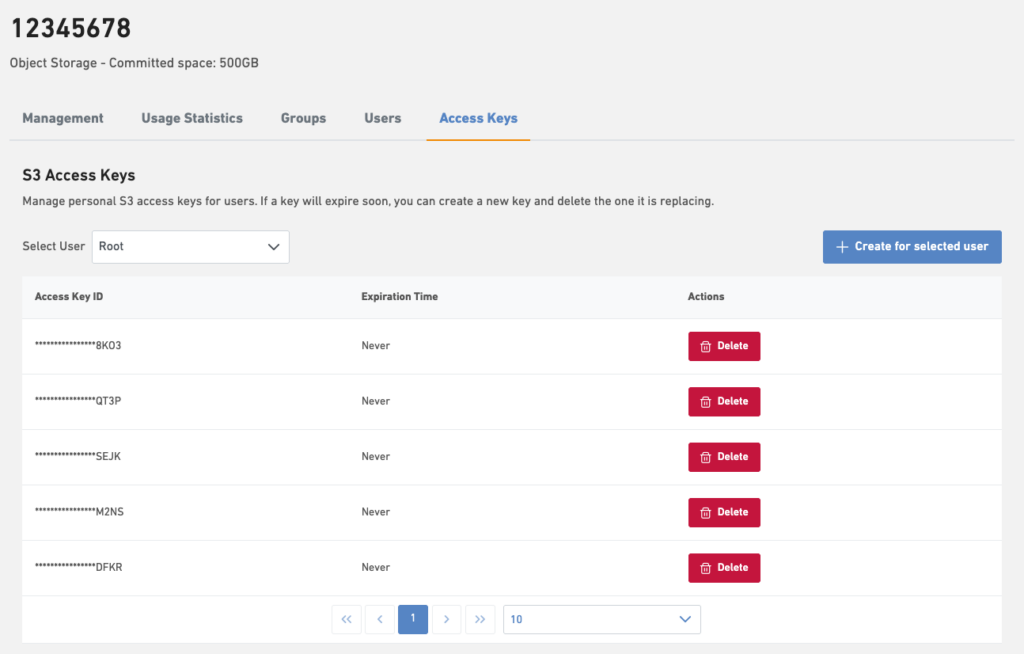
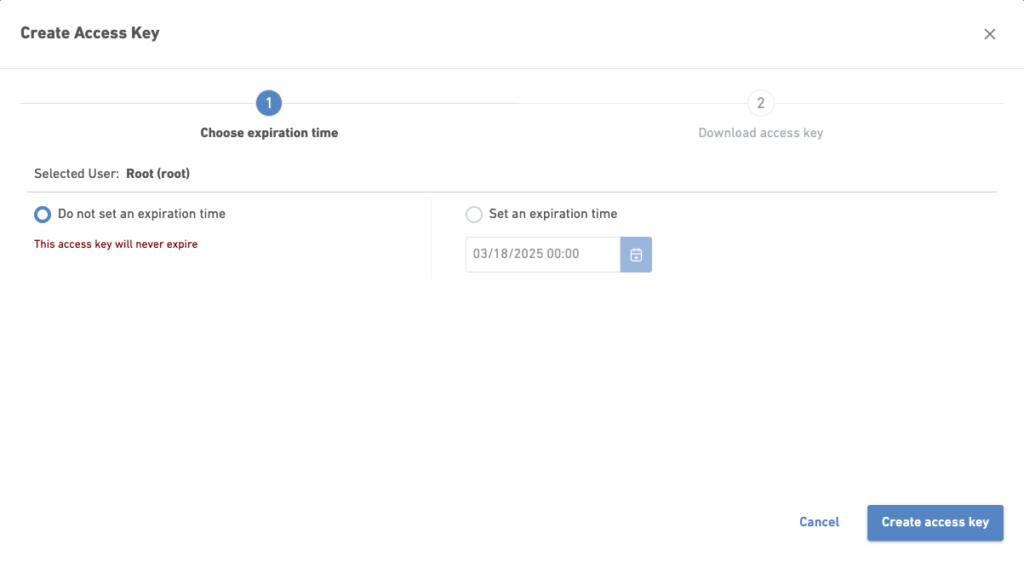
Click on the ‘Create for selected user’ button. A new dialogue will pop up asking if you want to set an expiration date. You can either opt for no expiration date or set a date to have a key automatically expire. Expired keys are removed automatically. Consider your use case and security policies to decide if you need expiring access keys. Click ‘Create access key’ and the system will create a new key.
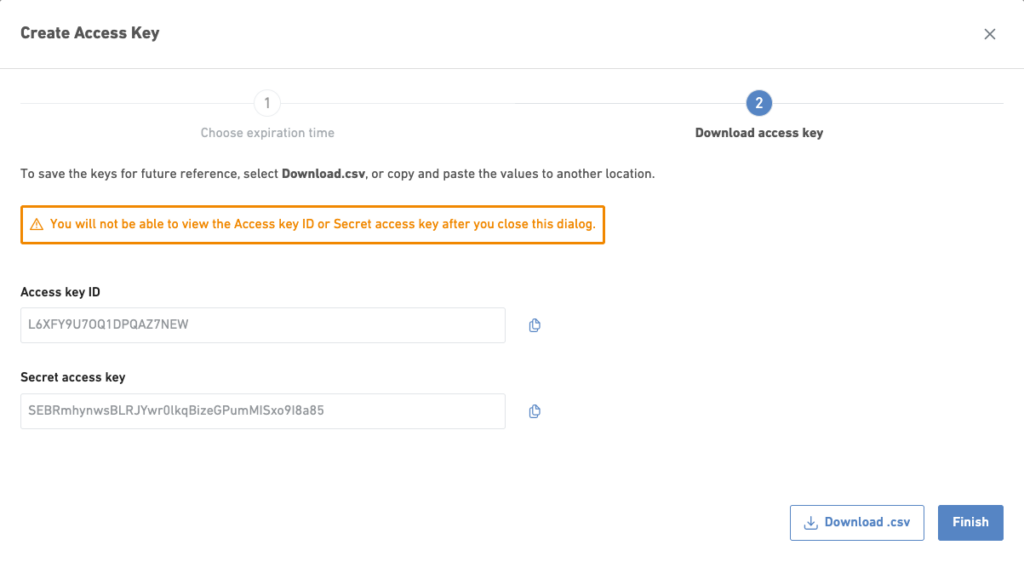
Once your new key is generated you can either download it as a .csv file or copy the details. NOTE: After clicking ‘Finish’ you will not be able to view the key anymore. Make sure to have your copy before continuing.
You can now use the S3 API with your access keys to manage buckets and objects via API.
Other actions
Manage groups (optional)
To manage groups we assume you are logged in using your root account. Groups can be created to give multiple users the same permissions. This can be done from the ‘Groups’ tab.
Creating a group
- Click on the blue ‘Create’ button which will show the following pop-up:
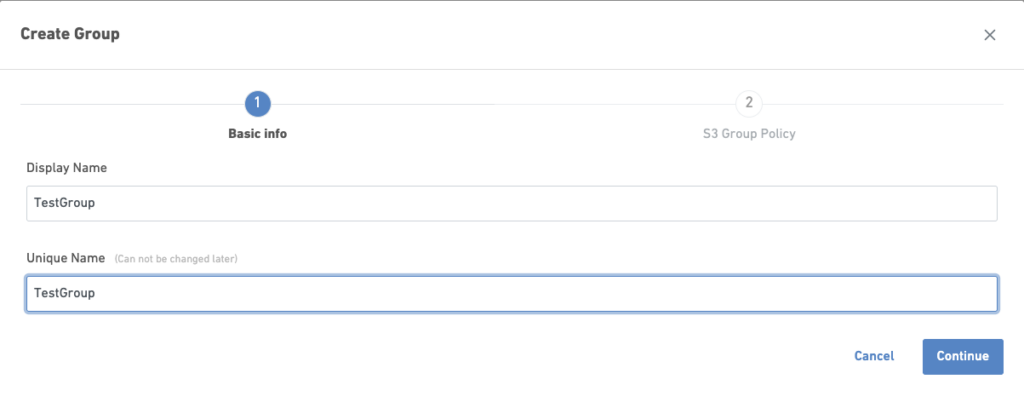
- For now, only Local groups are supported.
- Fill in a Display name and a Unique name (only unique to your own tenant account).
- The next step is adding a S3 group policy:
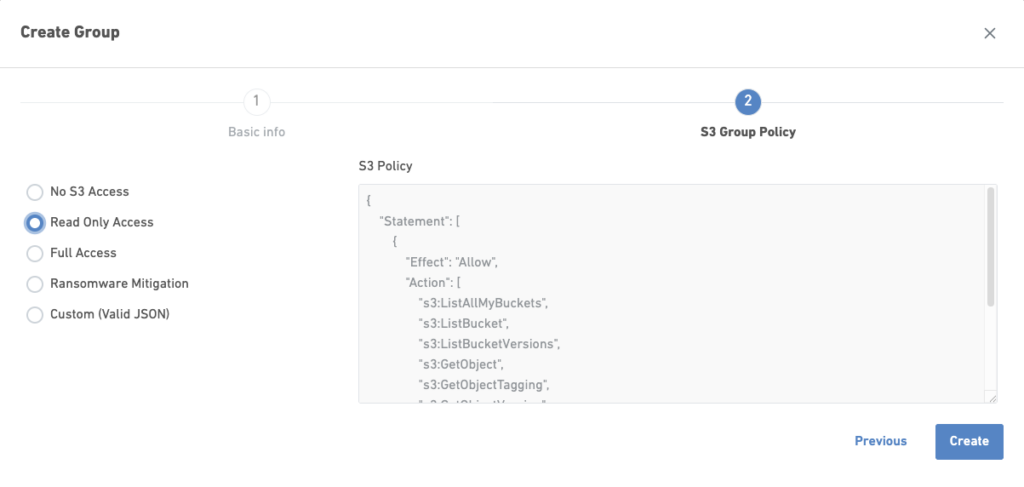
- Click on the ‘Create’ button to create your new group.
Editing a group
- Click on the ‘Edit’ button behind your group in this example ‘TestGroup’ to show the edit options:
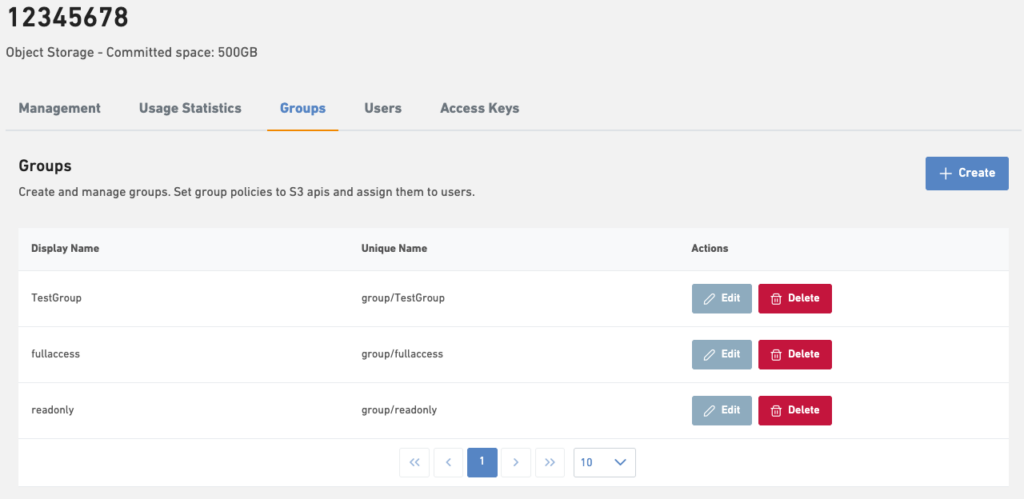
- Here you can change some of the settings you just got while creating a new group (Display Name and S3 Group Policy):
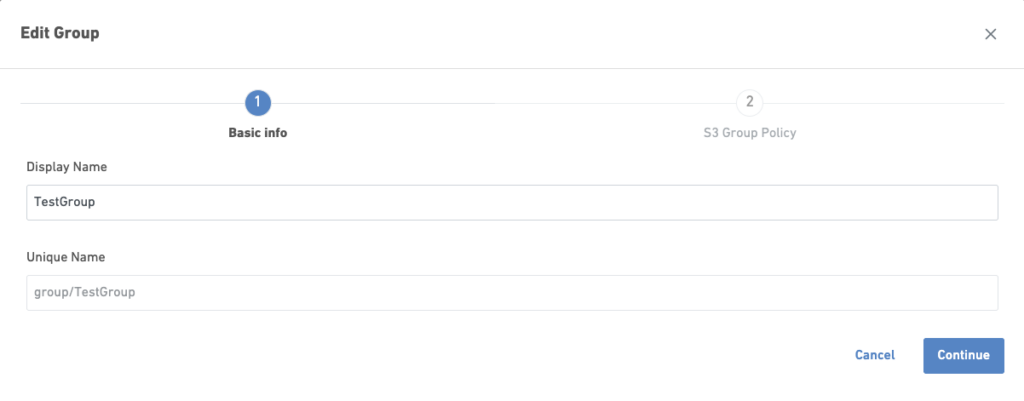
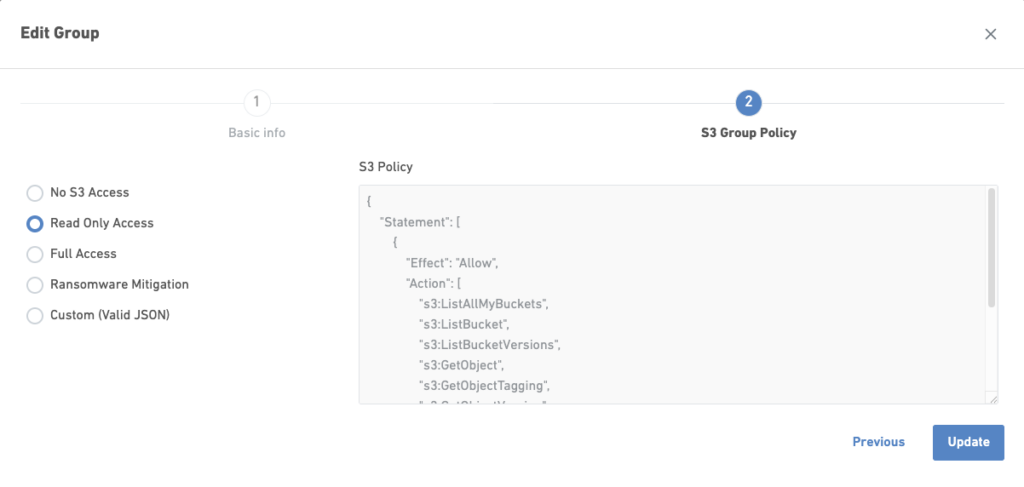
- Click on ‘Update’ to save your changes.
Delete a group
- To remove a group you simply click on the red ‘Delete’ button behind the created groups:
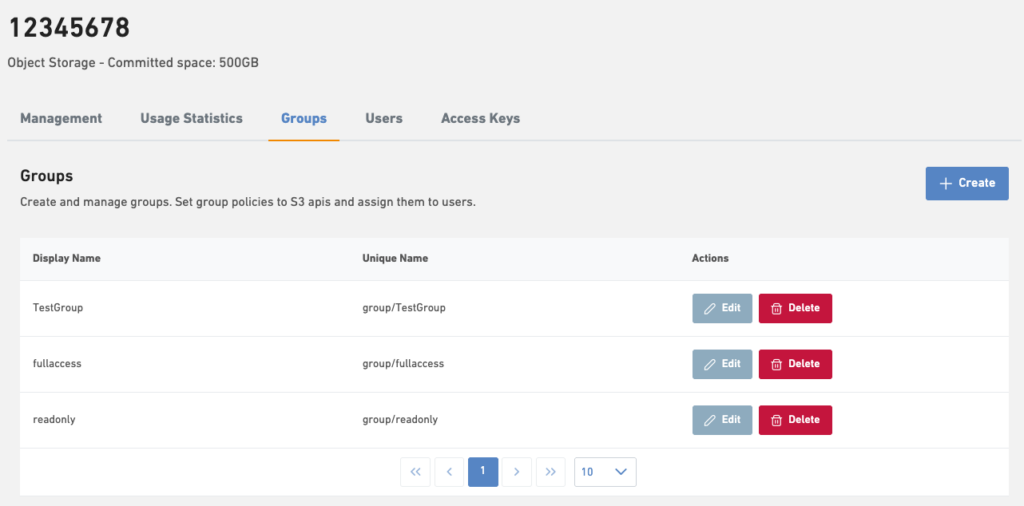
- This will show a warning to make sure if you’re sure that you want to remove it, just click ‘Delete group’ once you’re sure.
Manage users (optional)
To manage users we assume you are logged in using your root account. Users can be created to give additional people separate accounts. This can be found in under the ‘Users’ tab.
Create user
- Clicking on the blue ‘Create’ which will show the following pop-up:
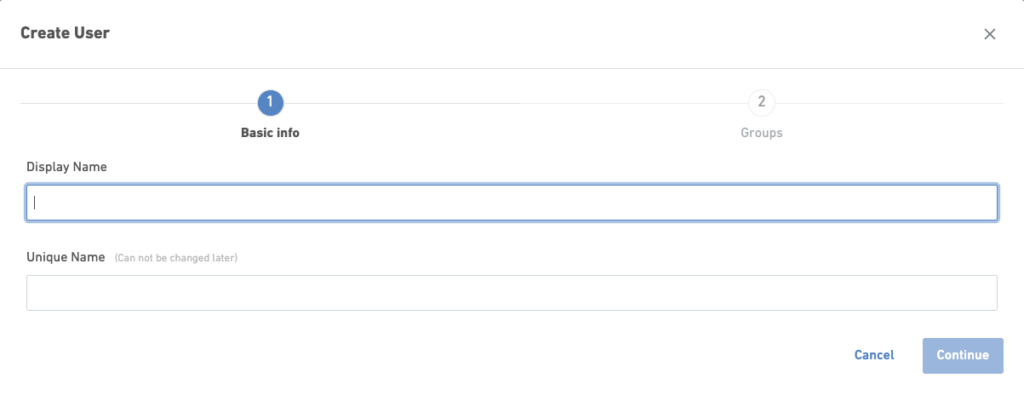
- Fill in the desired full name & username and click on ‘Continue’.
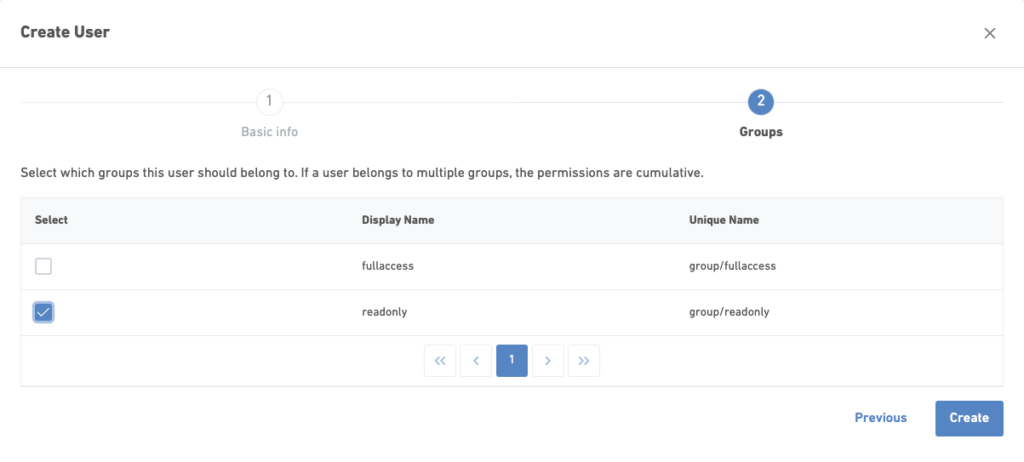
- Here you assign the user to a group if you’ve created any or else just click on ‘Create’.
Edit user
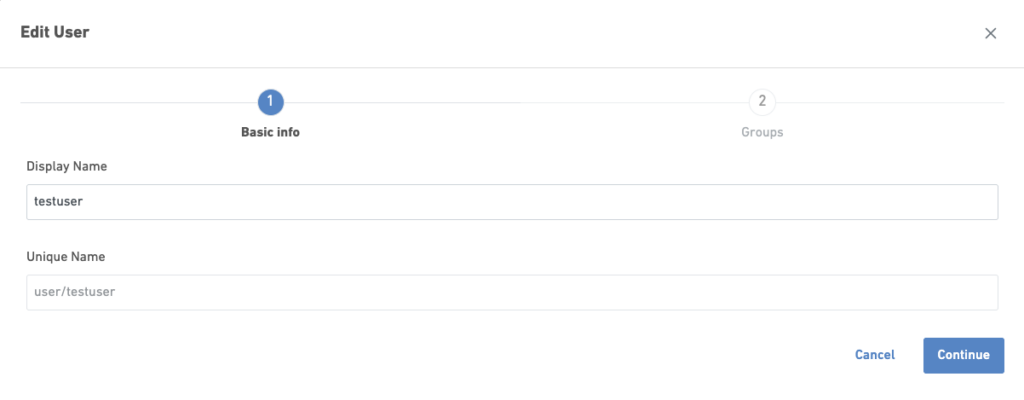
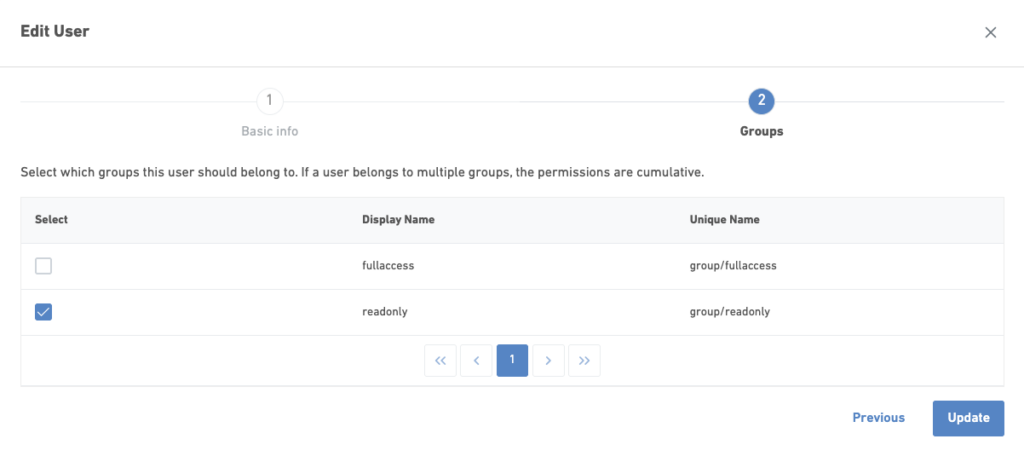
- Click on ‘Edit’ button behind your user in this example ‘testuser’ to show the edit options:
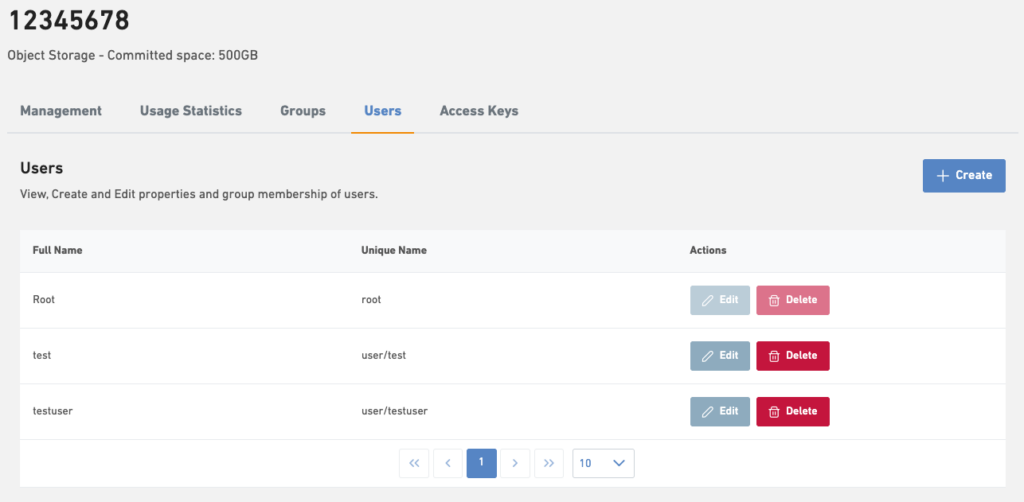
- Here you can change the settings for your user (Display Name and Groups):
Delete user
- To remove a user you simply click on the red ‘Delete’ button behind the user you want to remove:

- This will show a warning to make sure if you’re sure that you want to remove it, just click ‘Delete user’ once you’re sure.