In the private network Management tab, you can create a private network which connects two or more servers within the same data center. There is a section where the enabled servers in the private network are displayed. The available server section displays your servers which can be added to your private network. In this management tab, you will have the possibility to upgrade or downgrade the port speeds of enabled servers.
Create a private network
Leaseweb offers customers that have Dedicated or Bare Metal servers the possibility to create private network connections. Two or more servers within the same data center can easily be connected over dedicated network segments. VLAN technology ensures secure private connections.
This page will describe how to use the Customer Panel interface to manage your private network. For more information and specifications of the product, please see the Private Network page.
All actions mentioned on this page can also be performed using our extensive API interface. Please check the Developer Portal for all necessary documentation about using our API’s.
Private Network Overview page
Perform the following steps to get an overview of all the Dedicated & Bare Metal servers that have private network enabled:
- In the menu bar, under Network, select Private Network.

- The Private Network page displays.

Information
Per server, the following information is available:
| Column name | Description |
|---|---|
| ID | Displays the server ID |
| Reference | Displays the customer reference of the server |
| Location | Displays the datacenter, suite and rack where the server is located |
| CIDR | Displays CIDR range of IP addresses associated with the network |
| VLAN | The VLAN that the Private Network uses |
| Port speed | Displays CIDR range of IP addresses associated with the network |
 | Remove the server from the private network and the current monthly price for the usage of private network |
Enabled servers
Here you can see the servers that are currently part of your private network.
Information
- The VLAN ID is informational only. Private networking uses the “Internal” interface of your server, using untagged Ethernet frames.
- A DHCP server will assign a free IP address from the CIDR prefix to each of your servers. Through the DHCP setting at the top of the page, it is also possible to disable this behaviour and use static addressing instead.
- By default, the /27 prefix length provides a maximum of 27 usable addresses. Please contact support if you require a larger Private Networking subnet
Actions
The following actions are possible for Private Network-enabled servers:
DHCP Setting
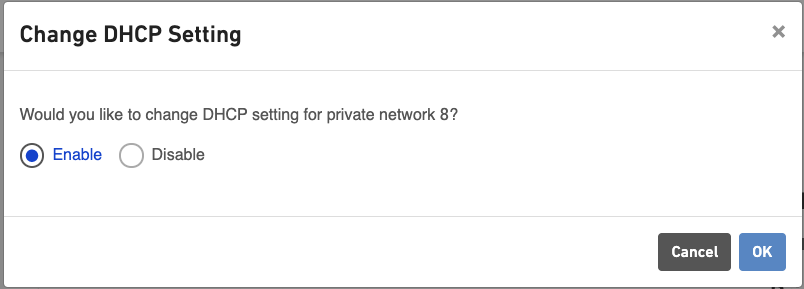
It is possible to disable the DHCP server on the private network. This will also disable all other layer-3 services and turn your private network into a pure layer-2 Vlan.
To disable DHCP, click on the Edit icon a new window will pop up.

Change the option to disable and click OK. A success message will popup:

And the changes are applied immediately.
Information
If some of your servers are still using DHCP at this point, they will lose connectivity at this point.
Change the port speed of your private network connection
In each line of the Private Network, the current port speed is shown.

Additionally, it is possible to upgrade or downgrade your private network port speed to 1Gbps / 100Mbps / 1Gbps. The upgrade will cost an additional fee per month.
- To upgrade or downgrade your port speed click the link right of the displayed port speed
 .
. - The port speed will be adjusted immediately. A success dialogue box will appear.

- Sometimes it can take some time till the actual port speed is changed due to the speed of network devices. It should not be more than 2 minutes per port
The fee for the upgrade you have selected will appear on your next invoice.
Remove your server from the private network.
If you do not want the server configured in your private network anymore you can remove the server by selecting the Remove link.
- Select the Remove link.

- The server will directly be disconnected from the private network. And a success dialogue will appear.

- Sometimes it can take some time till the actual disconnection is done due to the speed of network devices. It should not be more than 2 minutes per port
Add a Dedicated Server to a Private Network
In the available server section, it is possible to add a Dedicated or Bare Metal server to a private network. The upgrade will cost an additional fee per month.
- To add an available server to a private network click the Add link.

- The success dialogue box appears, displaying the ID of the new server added to the private network.

 The server will be added to the private network immediately. Because communication with network devices is a bit slow it can take some time to have the configuration done. It should not take more than 2 minutes per server.
The fee for the added server will appear on your next invoice.
Configuring your server for Private Network
When a server is added to the Leaseweb Private Network, you will still need to configure an IP address on the server’s Private Network interface to communicate with other servers on the private network. This is done as follows:
Windows
In Windows, any network adapter that is not explicitly configured will use DHCP by default. After enabling Private Network for a server, you will see the adapter receive an IP address:
Linux
Debian and Ubuntu (except Ubuntu 18)
For Debian operating systems and its derivatives, edit the /etc/network/interfaces file and add the following lines:
allow-hotplug eth1
iface eth1 inet dhcp
Where eth1 is the interface connected to the Private Network. It could have a different interface name.
After saving and closing, type ifup eth1 (Change interface name if different) to apply the changes. If all is well, you will see the interface receive an IP address:
root@localhost:~# nano /etc/network/interfaces
root@localhost:~# ifup eth1
Internet Systems Consortium DHCP Client 4.3.5
Copyright 2004-2016 Internet Systems Consortium.
All rights reserved.
For info, please visit https://www.isc.org/software/dhcp/

Listening on LPF/eth1/9c:8e:99:08:9a:f6
Sending on   LPF/eth1/9c:8e:99:08:9a:f6
Sending on   Socket/fallback
DHCPDISCOVER on eth1 to 255.255.255.255 port 67 interval 4
DHCPDISCOVER on eth1 to 255.255.255.255 port 67 interval 11
DHCPDISCOVER on eth1 to 255.255.255.255 port 67 interval 16
DHCPREQUEST of 10.32.18.193 on eth1 to 255.255.255.255 port 67
DHCPOFFER of 10.32.18.193 from 10.32.18.221
DHCPACK of 10.32.18.193 from 10.32.18.220
bound to 10.32.18.193 -- renewal in 39073 seconds.
Ubuntu 18
With Ubuntu 18 Netplan is introduced, which changes the way network configurations are created within your Operating System. All configuration is done in a *.yaml file located in /etc/netplan.
Edit the *.yaml file with your favourite editor and add the following 4 lines.
  ethernets:
    eno2:
      dhcp4: yes
      dhcp6: no
Your *.yaml file should look like below.
Save your file after you edit it and apply the changes with the following command: sudo netplan apply.
root@host:~# cat /etc/netplan/01-netcfg.yaml
# This file describes the network interfaces available on your system
# For more information, see netplan(5).
network:
  version: 2
  renderer: networkd
  ethernets:
    eno1:
      dhcp4: no
      dhcp6: no
      addresses: [A.B.C.D/EE]
      gateway4: A.B.C.Z
      nameservers:
        addresses: [8.8.8.8]
  ethernets:
    eno2:
      dhcp4: yes
      dhcp6: no
Explanation
A.B.C.D/E: Your main IP address and your Subnet Mask. You can find this information in your Customer Portal under Network tab of a specific server.
A.B.C.Z: The gateway of your main IP. You can find this information in your Customer Portal under Network tab of a specific server
eno1/eno2: Network Interface names. This can be any given name, but eno1/eno2 are the most usual names.
CentOS
The network configuration is stored in /etc/sysconfig/network-scripts/ifcfg-eth1, where eth1 is the interface connected to the Private Network. Edit this file and change ONBOOT=no to ONBOOT=yes
After saving and closing, type ifup eth1 to apply the changes. If all is well, you will see the interface receive an IP address:
[root@localhost ~]# nano /etc/sysconfig/network-scripts/ifcfg-eth1
[root@localhost ~]# ifup eth1
Determining IP information for eth1... done.
[root@localhost ~]# ip address show dev eth1
3: eth1: <BROADCAST,MULTICAST,UP,LOWER_UP> mtu 1500 qdisc mq state UP qlen 1000
    link/ether 9c:8e:99:08:9a:f6 brd ff:ff:ff:ff:ff:ff
    inet 10.32.18.193/27 brd 10.32.18.223 scope global dynamic enp34s0
       valid_lft 86370sec preferred_lft 86370sec
    inet6 fe80::9e8e:99ff:fe08:9af6/64 scope link
       valid_lft forever preferred_lft forever
BSD
The network configuration is stored in /etc/rc.conf or /etc/rc.conf.d/network. Edit this file and add the following line:
ifconfig_bge1="DHCP"where bge1 is the interface connected to the Private Network
After saving and closing, type dhclient bge1 to apply the changes. If all is well, you will see the interface receive an IP address:
root@localhost:~ # ee /etc/rc.conf
[...]
"/etc/rc.conf" 7 lines, 233 characters
root@localhost:~ # dhclient bge1
DHCPDISCOVER on bge1 to 255.255.255.255 port 67 interval 6
DHCPDISCOVER on bge1 to 255.255.255.255 port 67 interval 10
DHCPOFFER from 10.32.18.221
DHCPREQUEST on bge1 to 255.255.255.255 port 67
ESXi
Please refer to the documentation of VMware: Creating Multiple Networks Within a Single ESXi Host
vCloud Private Cloud
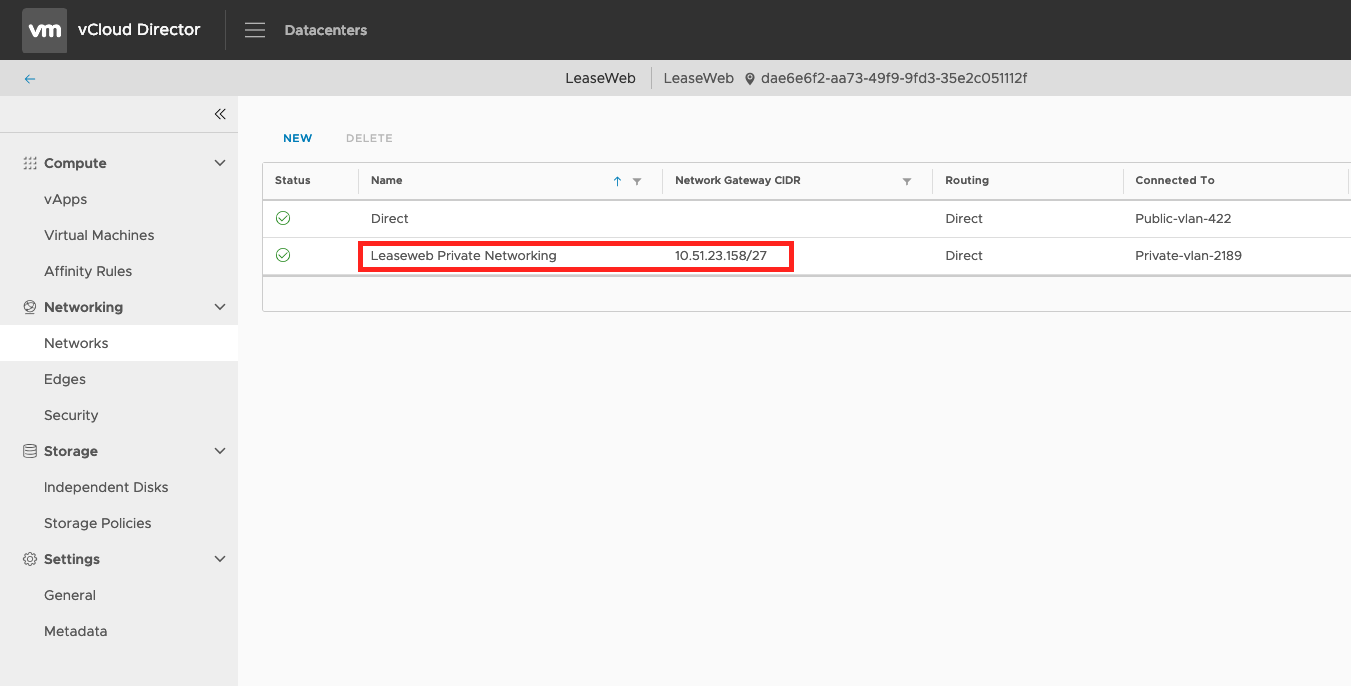
If your vCloud private cloud is configured for private network, you will see an extra network in your virtual data center named “Leaseweb Private Networking”.

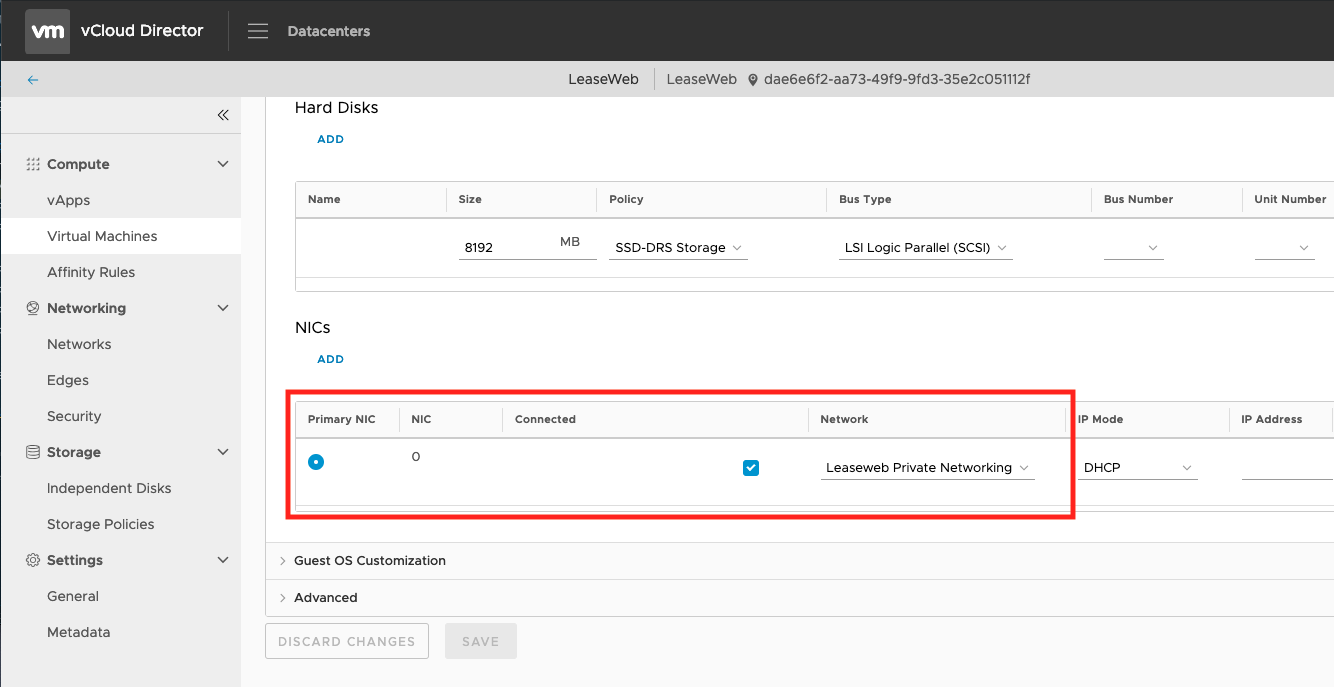
Connect your virtual machines to this network to access other servers which are also connected to your private network. You can do this by adding an NIC to the virtual machine and selecting “Leaseweb Private Networking” as your network.

Information
By default, the private network DHCP server provides a subnet with 27 usable IP addresses. Especially with virtual servers, this amount is easily exceeded. Larger subnets can be provided at no additional cost, please Contact support if you require more private network address space.
Technical details about private network
The Private Network is a site-wide, physically separate network, on which each customer is allocated their own VLAN. When a server is added to a private network, its corresponding switchport is added to the VLAN. This is always done “untagged” or “access” mode.
Additionally a DHCP service with a designated subnet is in the 10.x.x.x space provided for your convenience, however you are not required to use this. Since the connection is pure layer 2 Ethernet, you can also use static addressing with any IP space. There is no routing possible between the private network subnets of different customers.
Using VXLANs and Jumbo Frames is possible, see Jumbo Frames for details on how to configure this.