Contents
Common settings
You can use this article for the following purposes:
- How to configure email clients such as Microsoft Outlook, Apple Mail, or Mozilla Thunderbird with the settings shown.
- How to use the available email services to connect your email.
- How to use the Leaseweb Webmail —an additional service for people en route or working on multiple computers.
General Settings
Here's a quick overview of the available email services:
For NL customers:
Protocol | Server | TCP Port |
|---|---|---|
POP3 | 110 | |
POP3S | 995 | |
IMAP | 143 | |
IMAPS | 993 | |
SMTP | 25 / 587 | |
SMTPS | 465 | |
| Webmail | https://webmail.leaseweb.com/ |
For US customers:
Protocol | Server | TCP Port |
|---|---|---|
POP3 | 110 | |
POP3S | 995 | |
IMAP | 143 | |
IMAPS | 993 | |
SMTP | 25 / 587 | |
SMTPS | 465 | |
| Webmail | https://webmail.leaseweb.us/ |
Useful information about email settings
- To prevent spam, most Internet providers block/redirect port 25. To circumvent this, we've enabled email submission on TCP port 587.
- When configuring the outgoing mailserver, ensure to activate the SMTP Authentication-option.
- Mobile customers with a laptop and most home users should use port 587 for outgoing mail (SMTP).
- If you are unable to change the SMTP port, use the SMTP server of your local Internet service provider.
When using one of the secured services such as SMTPS / IMAPS / POP3S, ensure that SSL authentication (password-based) is selected. The username/password combination that is needed for authentication is the full email address and password for that Inbox. When adding your email account to your client, or when using Webmail, please ensure to enter the full address when logging in.
POP3 versus IMAP
POP3 is the well-known way to retrieve emails from a mail server over TCP/IP connection. By default, most email clients using POP3 collect mail from your inbox and download it to the computer. This prevents your Inbox from filling up. The downside is that it is not very flexible, a message downloaded to one computer is no longer in the Inbox, therefore it cannot be viewed from another computer any more.
IMAP gained popularity as it addresses this shortfall of POP3. The mail is viewed from the Inbox (but it can still be downloaded for caching or backup purposes), and it can be marked as read/unread and categorized in folders. All modern and mobile email clients support IMAP. IMAP is also the protocol used by most Webmail front-ends to communicate with the mail server. The downside is that it is your responsibility to prevent your Inbox from overflowing. When an Inbox is full, new messages will be rejected.
Configuring various email clients
Desktop clients
Microsoft Outlook 2016
Perform the following steps to create an Outlook email account:
- From the Tools menu, select Account Settings.
The Account Settings screen displays. - To create an email account, in the E-mail tab, click New.
The Add New E-mail Account wizard displays.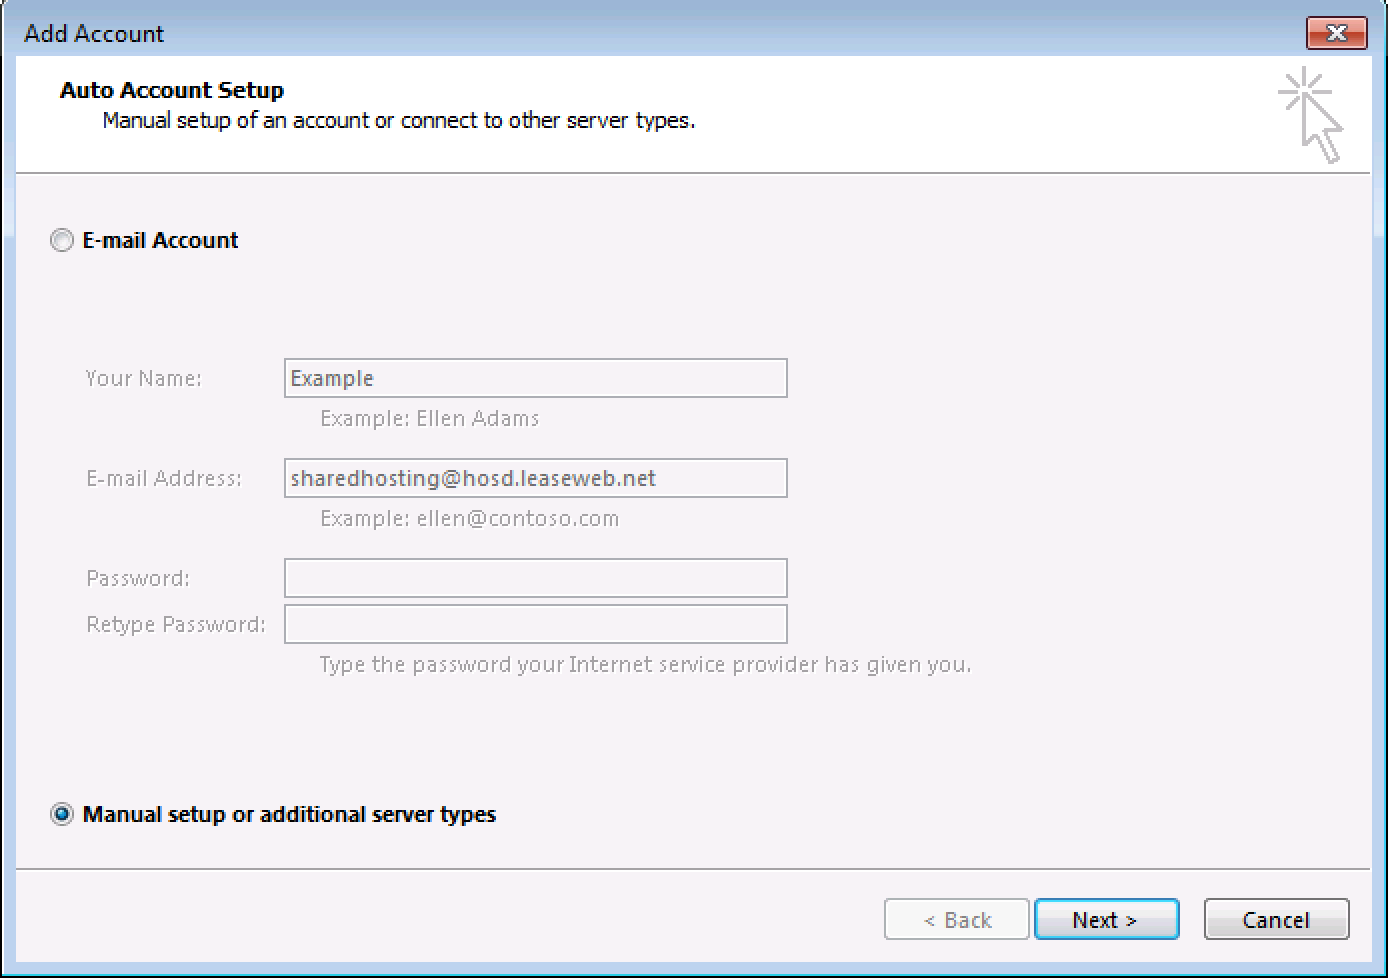
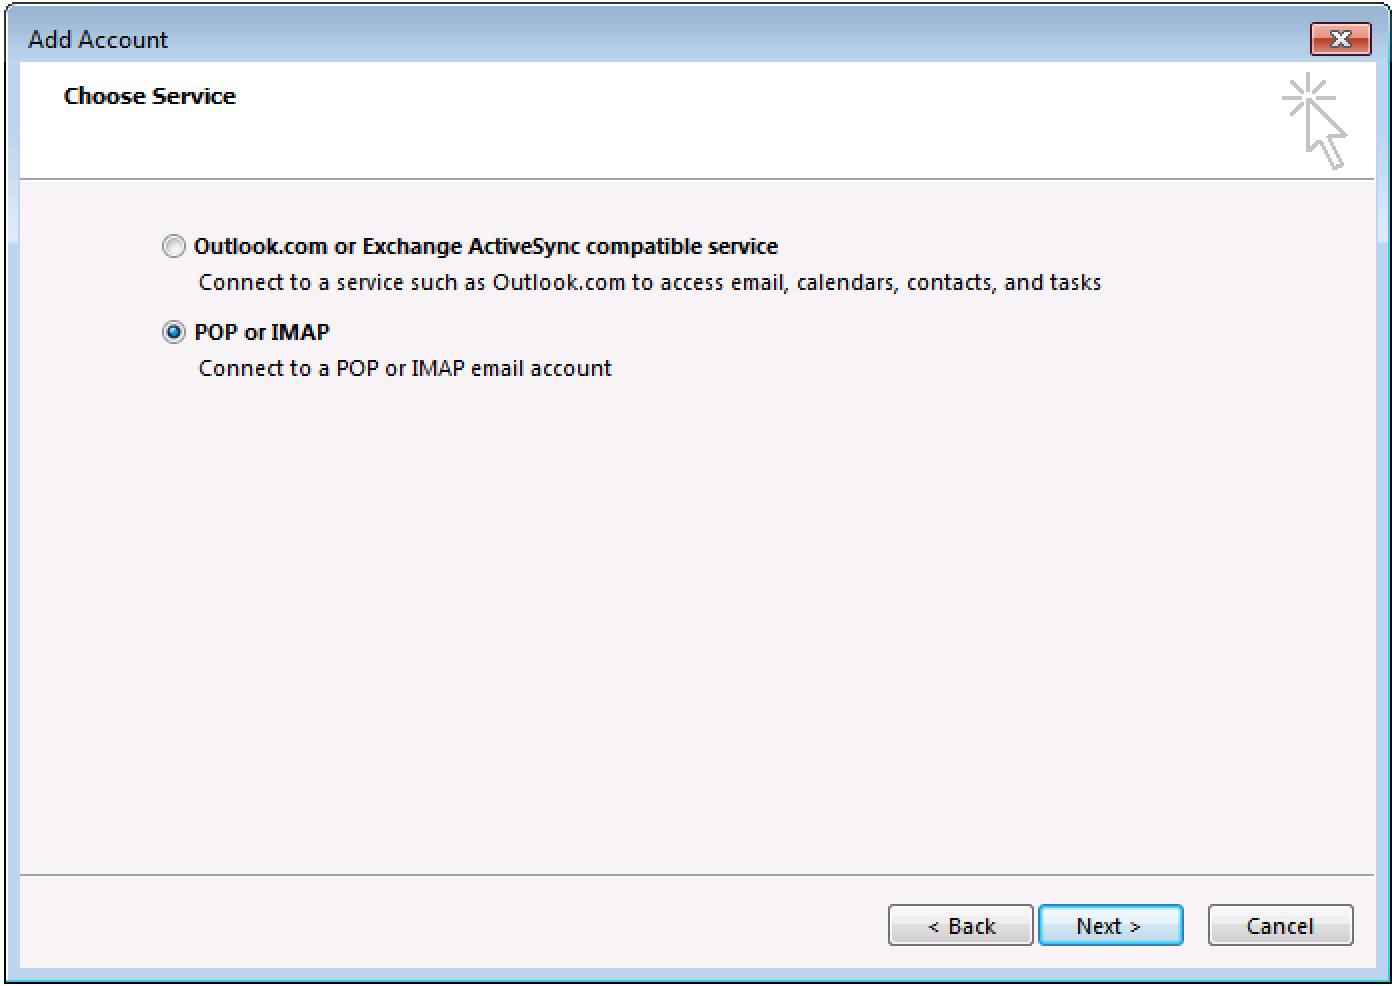
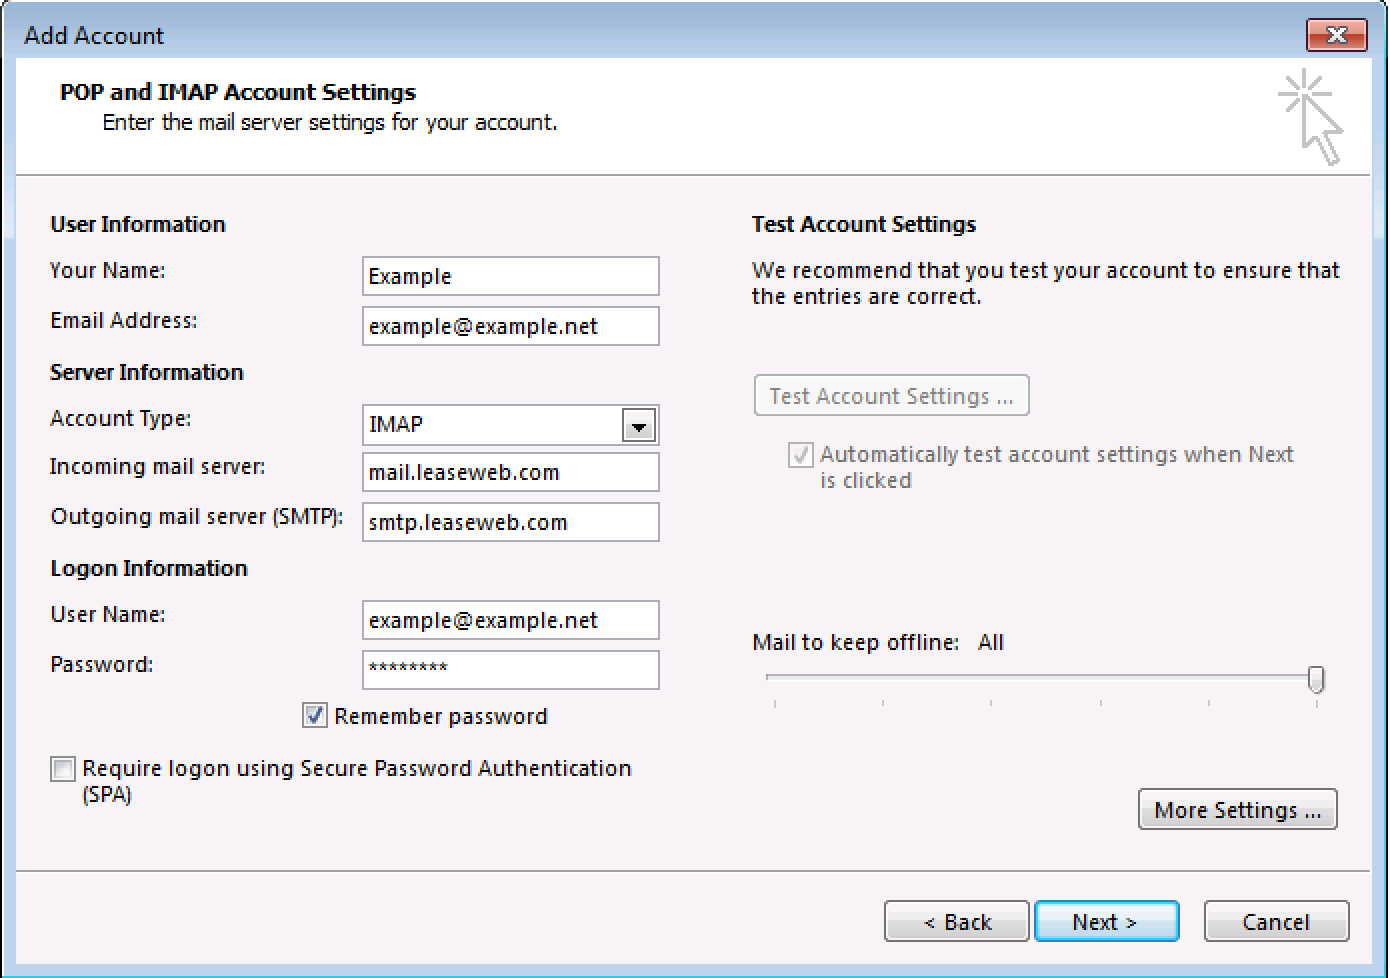
- Follow the steps in the wizard, and click Next until you finish the configuration.
Perform the following steps to edit an existing Outlook email account:
- From the Tools menu, select Account Settings.
The Account Settings screen displays. - To edit an email account, select the email account you want to change, and click Change.
The Change E-mail Account screen displays. - Click More Settings...
The Internet E-mail Settings screen displays.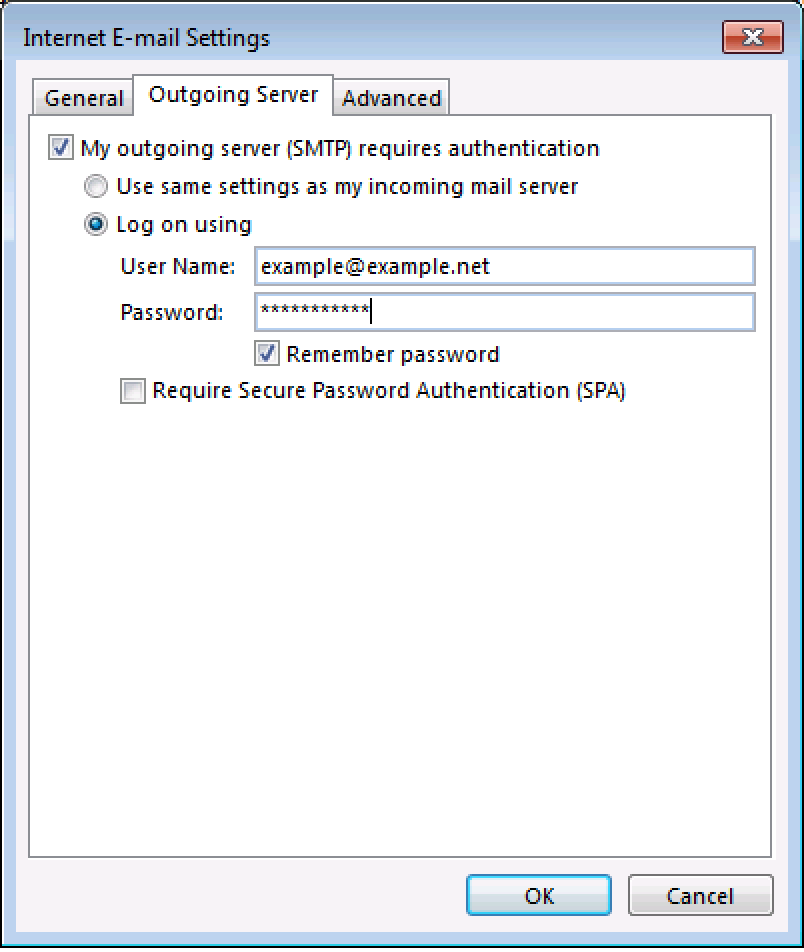
- In the Outgoing Server tab and the Advanced tab, make the required changes, and click Ok.
Apple Mail
Apple Mail is only available on Mac OS 10.13.3, and is installed by default.
Perform the following steps to configure your Apple Mail:
- From the Mail menu, click Preferences.
The Accounts screen displays. - |In the Accounts tab, click the plus sign (+) at the bottom of the Accounts screen.
The Add Account pop-up window displays.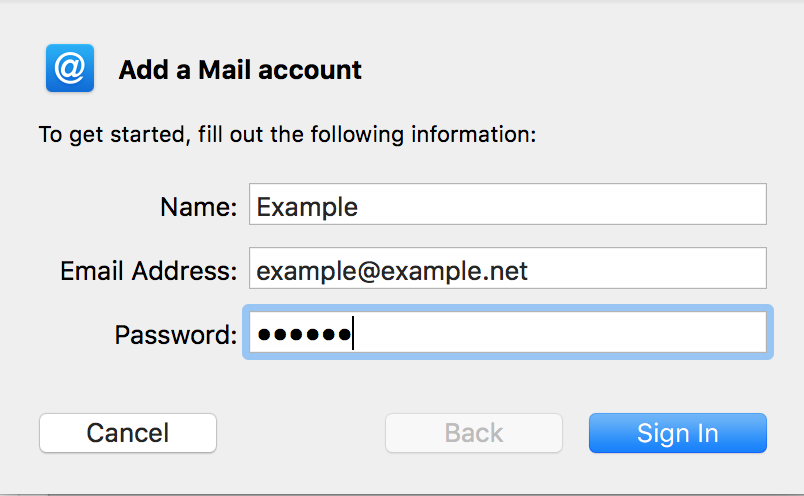
- Enter the correct email address and password, and click Continue.
- The Mail Server pop-up window displays.
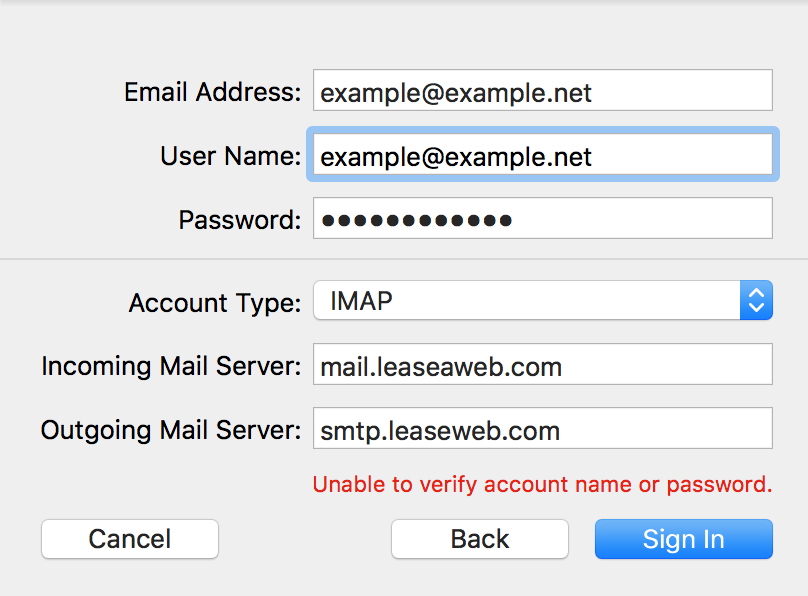
- Select the protocol you would like to use, and click Continue.
Fill in the correct Email address as Username and enter the correct Password.
Reference: See the General settings for incoming mail server details. - Your mail account is now configured.
Mozilla Thunderbird
Thunderbird is a free, cross-platform email client developed by Mozilla
You can download Mozilla Thunderbird here.
Perform the following steps to create a Mozilla Thunderbird email account:
- From the Tools menu, click Account Settings.
The Account Wizard screen displays. - Select the Email account option, and click Next.
- The Account Wizard will request for your Name, Email Address, and server information.
Enter relevant details, and click Finish to complete the task.
Perform the following steps to edit an email account:
- From the Tools menu, click Accounts Settings.
The Account Settings screen displays. - From the left pane, click Outgoing Server (SMTP) option.
The Outgoing Server (SMTP) Settings screen displays. - Configure the outgoing server settings based on the screenshot provided.
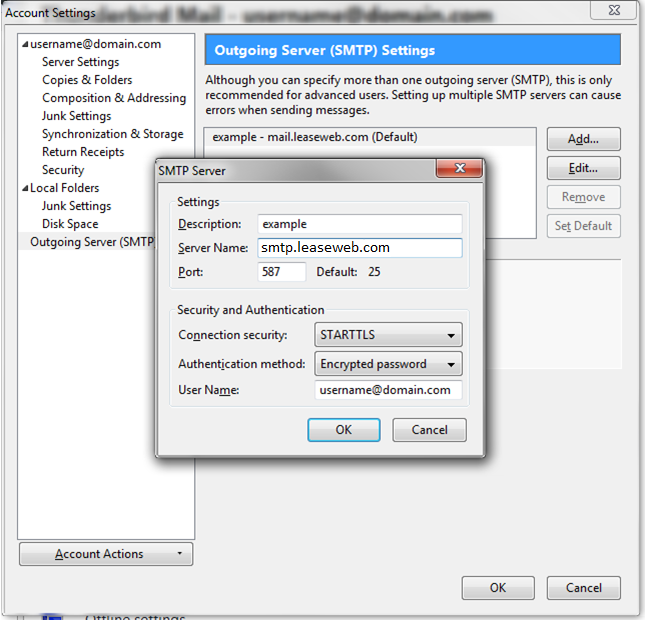
Note:
If your local Internet provider closed port 25, use TCP port 587 instead. From the left pane, click Server Settings option.
The Server Settings screen displays.- Configure the server settings based on the screenshot provided.

Note:
IMAP can also be used when Thunderbird auto detects the account. By clicking Manual Setup, IMAP can be selected. The server addresses and username/password remain the same, only the ports differ.
Leaseweb Webmail
Leaseweb Webmail provides a simple way to read and manage your email securely from a web browser:
For NL customers:
https://webmail.leaseweb.com/
For US customers:
https://webmail.leaseweb.us/
Mobile browsers are currently not supported for Leaseweb Webmail.
Mobile devices
Apple iOS
The screenshots are taken using iOS release 11.3.
Perform the following steps to set up Leaseweb email using IMAP on your Apple iOS device:
- On the home screen of the iOS device, press Settings.
The Settings menu displays. - Select Accounts & Passwords.
The Accounts screen displays.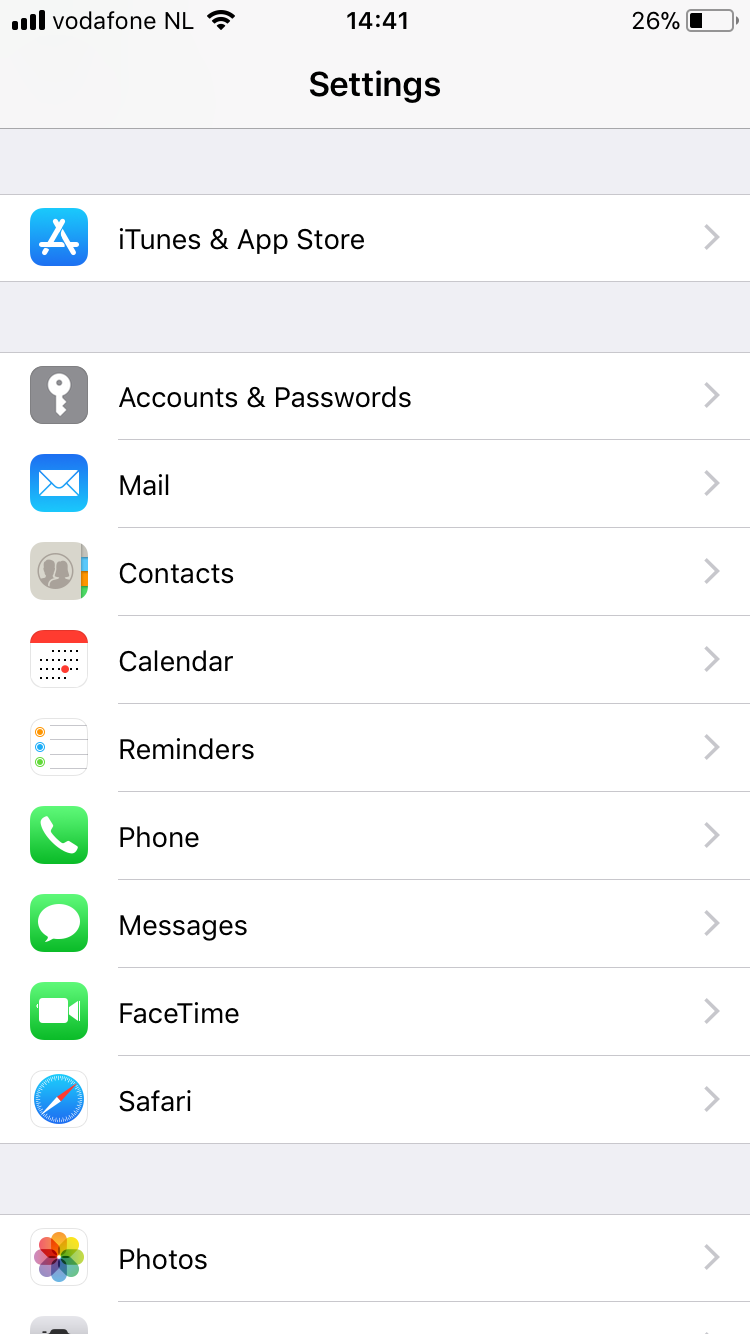
- Under Accounts tab, select Add Account.
The Add Account screen displays.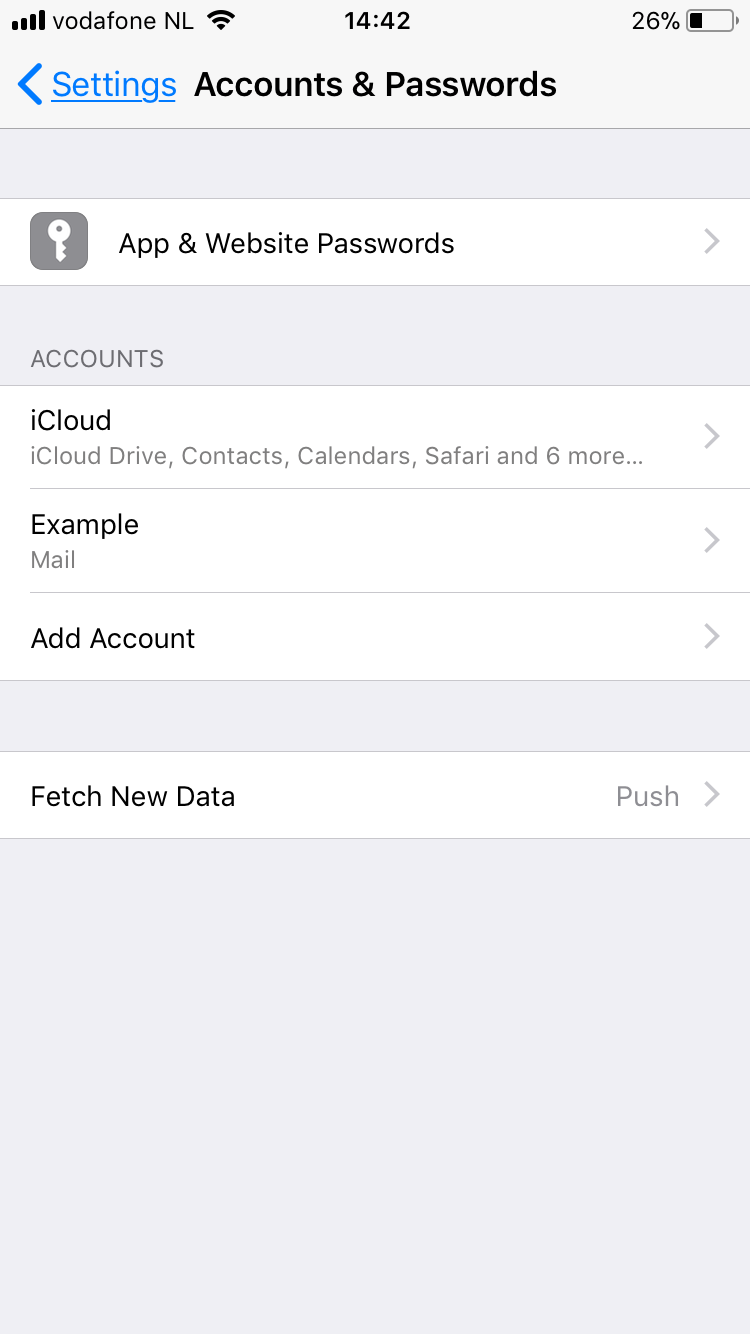
- Select Other.
The Other screen displays.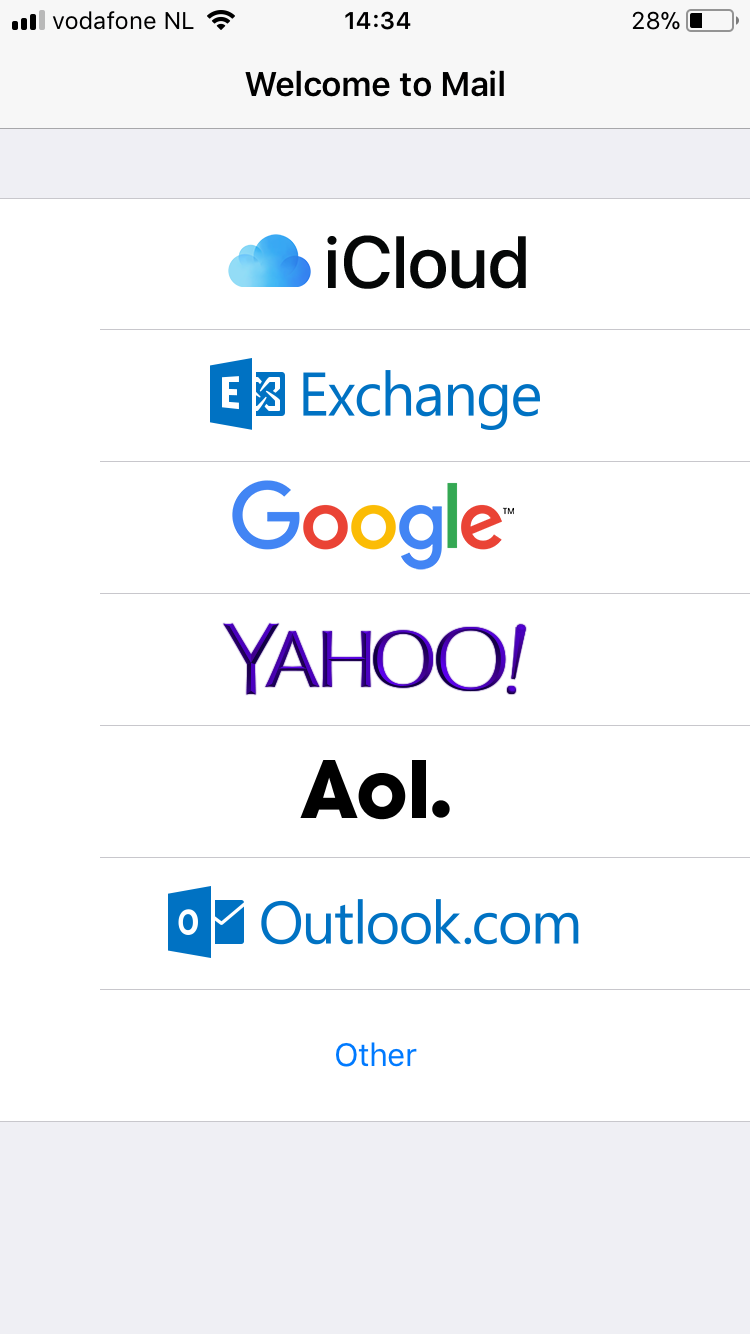
- Enter the following settings:
- Name: Your name - how it should display to receivers of your email.
- Email: The email address (mailbox) you want to use. In the screenshot, we have used example@example.net as an example.
- Password: The password for your mailbox.
- Description: Optional. You can add a description here such as "Mailbox for orders" or "General inquiries mailbox", and so forth.
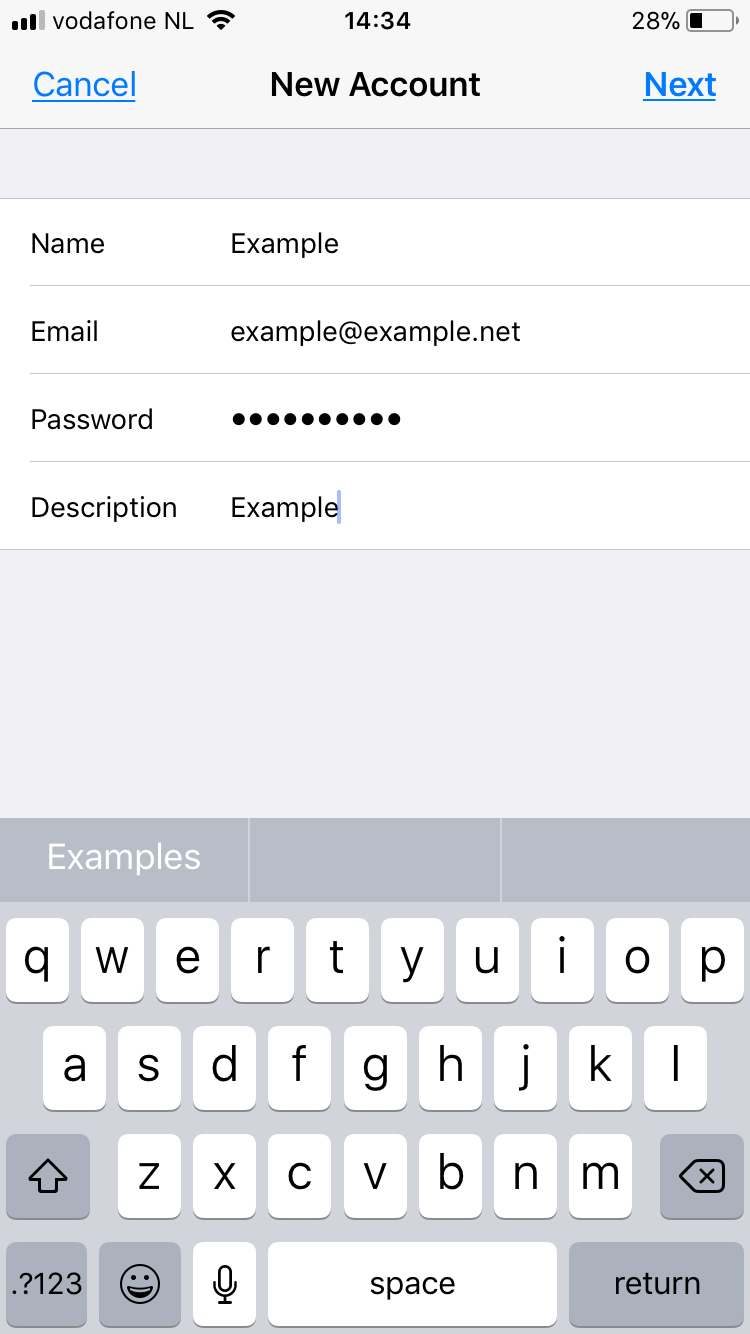
- Press Next.
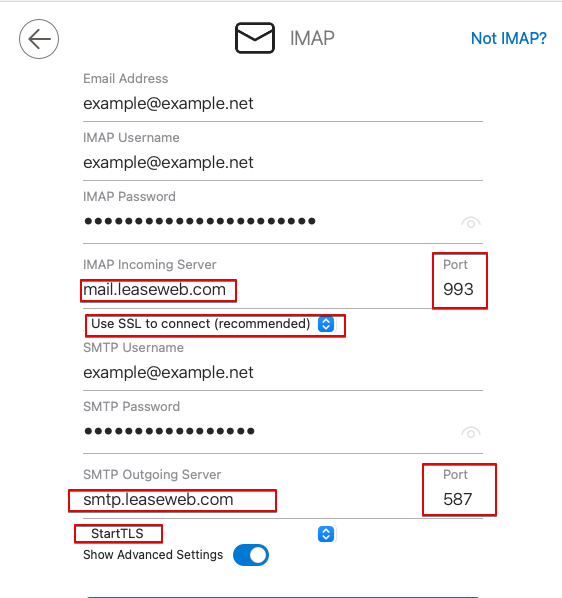
The New Account screen displays additional fields. - Enter the following settings:
- Ensure that the IMAP tab is selected.
- Name: Populated by default with value you entered in Step 6.
- Email: Populated by default with value you entered in Step 6.
- Description: Populated by default with value you entered in Step 6.
- Host Name: Incoming mail server hostname
Reference: See the General settings for details. - User Name: example@example.net;
- Password: Populated by default with value you entered in Step 6.
- Host Name: Outgoing mail server hostname
Reference: See the General settings for details. - User Name: example@example.net;
- Password: The password you entered at Step 6.
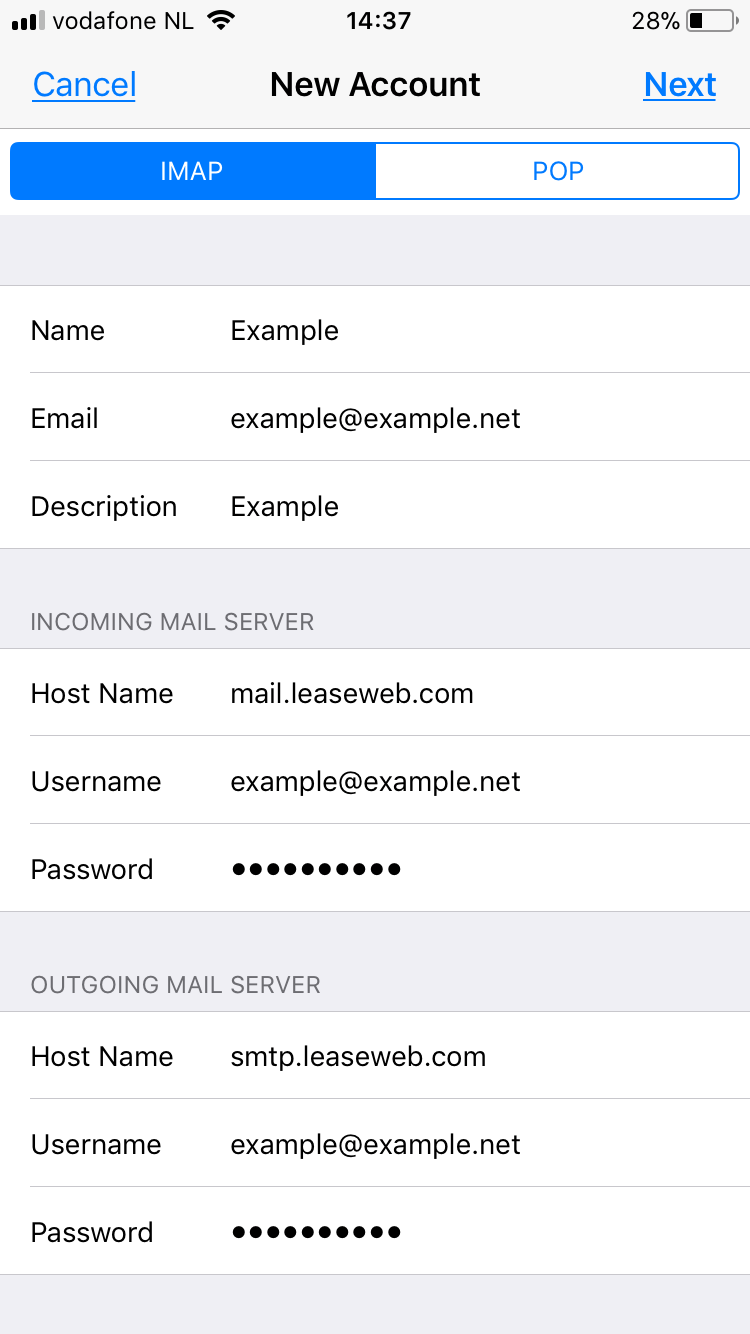
- Press Next.
The IMAP screen displays. - Ensure that the value of Mail is set to On.
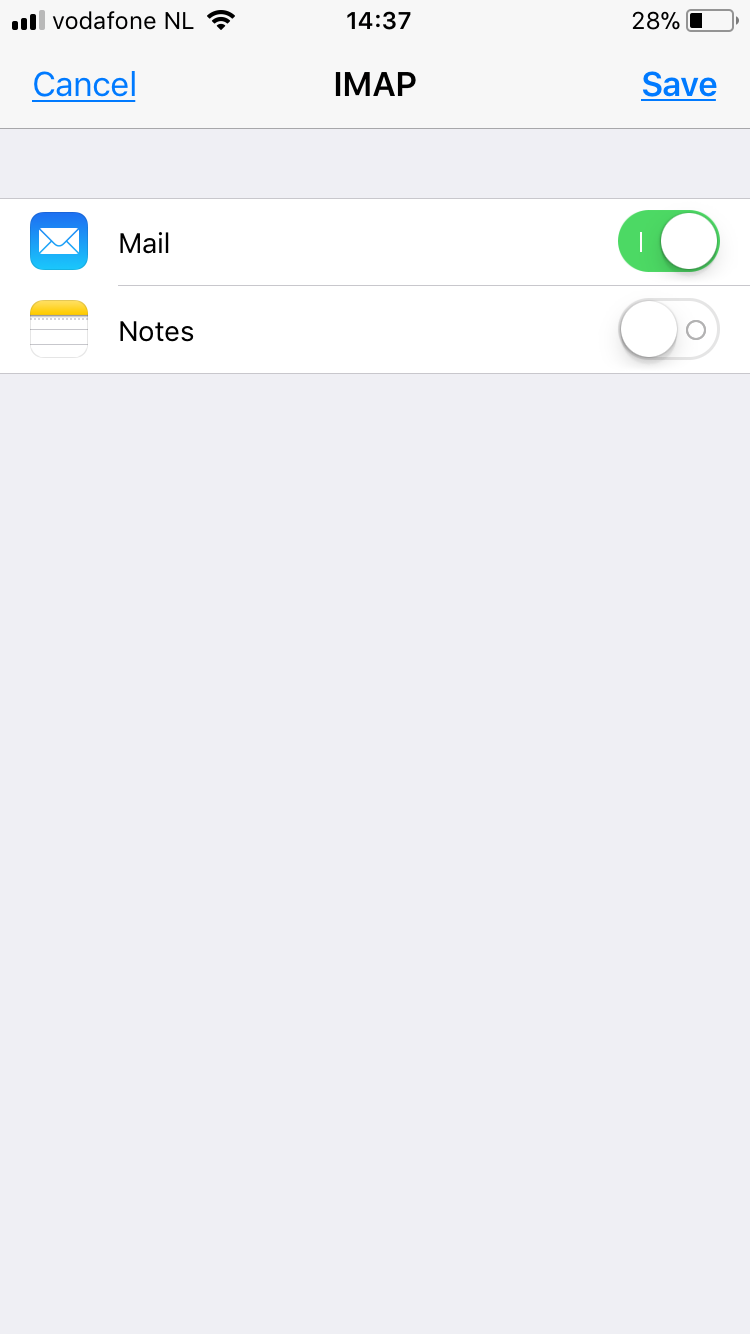
- Press Save.
- In the status bar, iOS displays "Account Added".
You can use your email account. As iOS uses IMAPS by default, your mail is received in a secure way.
Gmail as a mailclient
Configuring your Leaseweb mailbox inside Gmail is not supported and tested by Leaseweb. Although it is possible we cannot guarantee it works without issues.
FAQs about configuring email settings
When logged into my email and trying to connect it to gmail, in the pop-up, what username should I enter?
Your username is your registered email address.
How can I create an email address?
For detailed instructions, please visit Managing Emails.
How do I reset my email password?
For detailed instructions, please visit Managing Mailbox.